Add game artwork to OPL
Games will not display artwork by default in OPL. This guide will walk through downloading artwork using OPL Manager and then loading it onto an internal hard drive by mounting it to your PC with HDL Batch Installer or transferring it using a USB drive.
Tip: OPL themes
Some of these steps will allow you to copy OPL themes to your hard drive as well. Browse OPL themes on PSX Place here.
Download artwork using OPL Manager
Requirements
- A Windows PC
- OPL Manager
- PS2-formatted hard drive with game backups
Note: Game list
In order for OPL Manager to properly load the game list, game backups must already be installed onto your PS2 hard drive. If pointed to games that have not been installed, the tool will typically require correcting titles individually before loading them. If you have not yet loaded game backups onto your hard drive, follow this guide first.
Instructions
-
Connect PS2 HDD to PC.
-
Download and unzip the latest version of OPL Manager.
- You may need to install .Net Framework 4.8 first if you do not already have it.
-
Right click on OPL Manager and select
Run as administrator. -
When prompted to set mode, select the
Local PS2 HDDoption.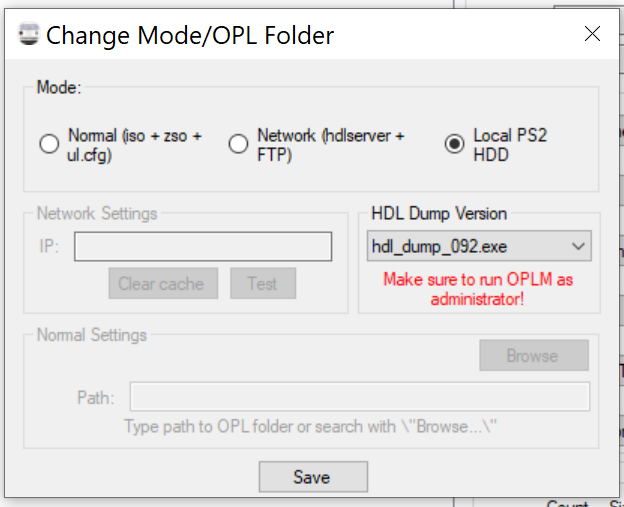
-
Load or refresh the game list cache.
-
On first startup, OPL Manager will display a dialog warning asking to populate the local cache. press
Yes.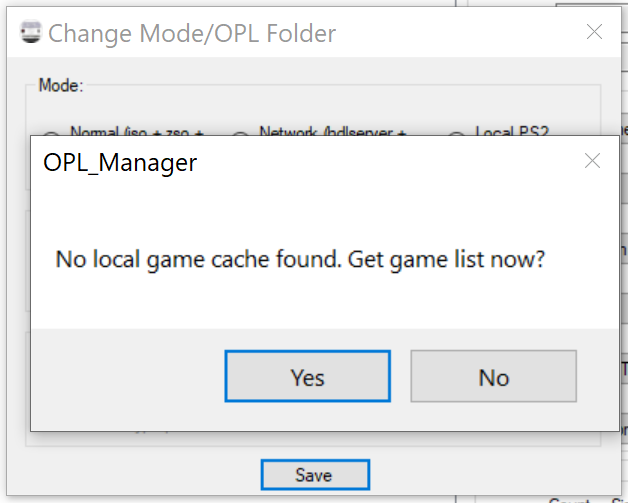
-
If not first startup, ensure that any additional games are added to the cache by selecting
Local HDD Options > Get game list.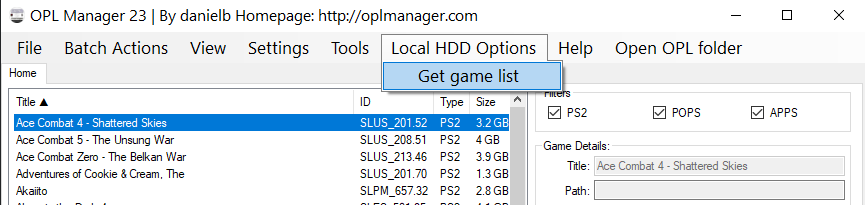
-
-
Ensure the hard drive is properly connected, then hit
OK.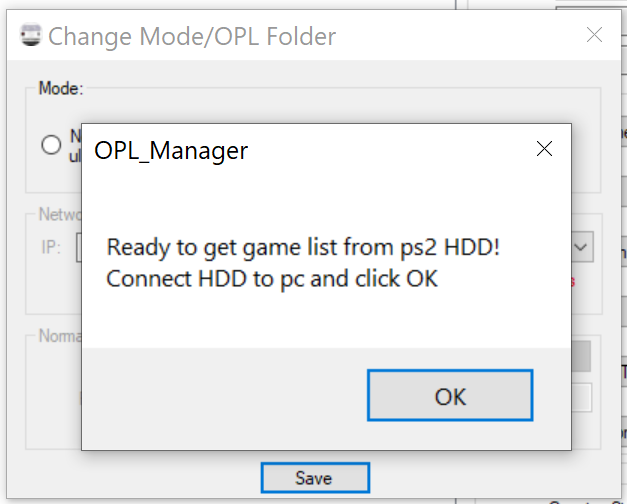
-
When the HDD is detected, OPL Manager will populate the list of titles under the
Hometab.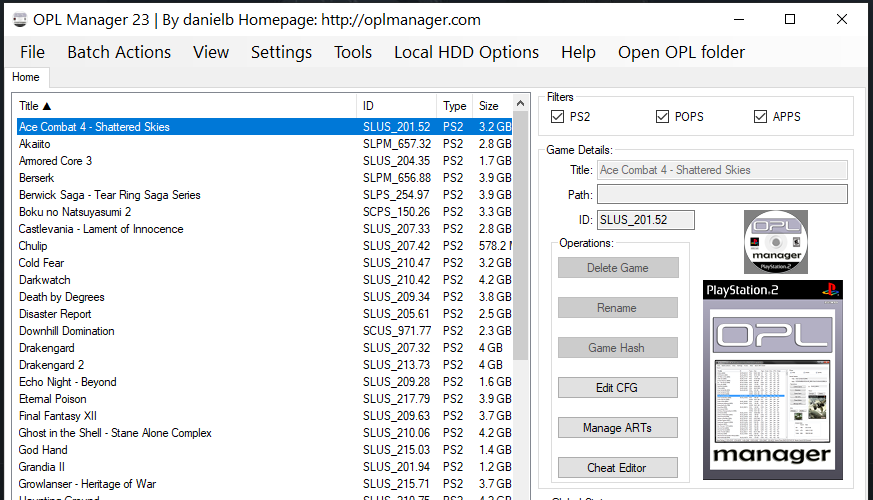
-
Under
Batch ActionsselectART Download.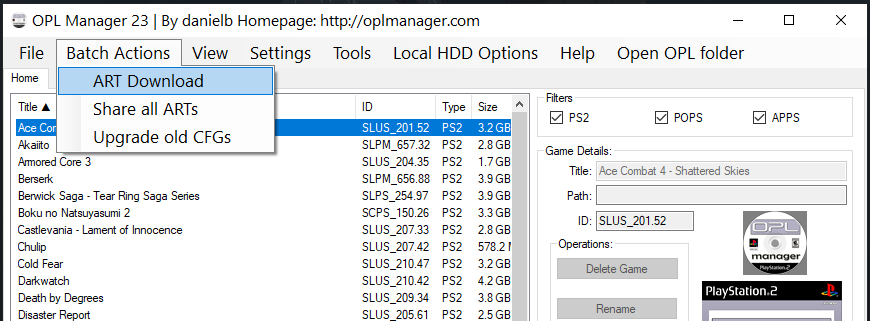
-
Select all the art options desired and click
Start. A dialog box will pop up when complete.- Assets will be saved to the art directory in
OPL_Manager/hdl_hdd/ART.
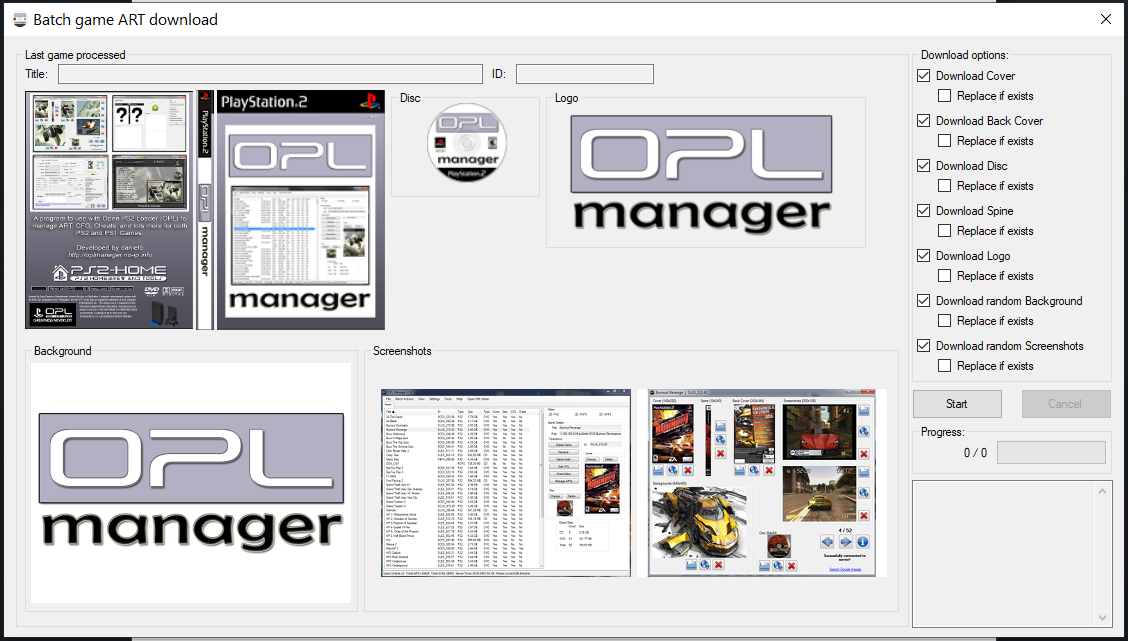
- Assets will be saved to the art directory in
Add artwork to HDD
Option 1: Directly to HDD
Artwork can be loaded directly onto the HDD by mounting the OPL partition with HDL Batch Installer.
Compatibility varies
This method is faster and more direct but opening PS2 HDD partitions does not work on all computers. Additionally, even if a hard drive can be mounted, some files may encounter errors with copying and require using the USB storage device method.
Requirements
- A Windows PC
- HDL Batch Installer
- Dokan
Instructions
-
Open HDL Batch Installer.
-
Click
Search ps2 HDD'sat the top to automatically find the PS2 drive or use the dropdown at the top to select it.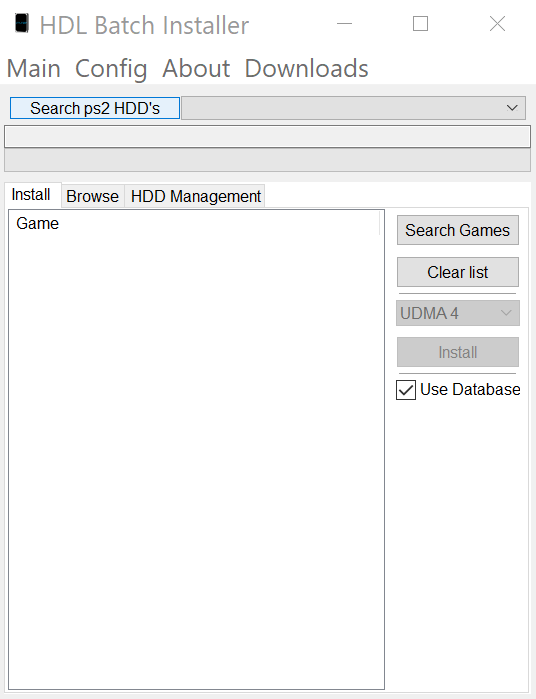
-
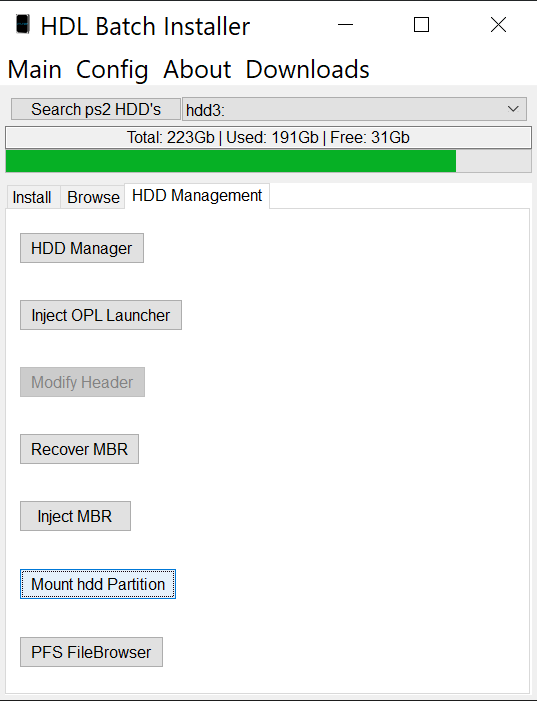
From the lower tabs select
HDD Management.
-
Click the
Mount hdd Partitionoption.-
You may be prompted to install Dokan if it is not installed already. Click the prompt to go to the website to download the installer. Alternatively, you can get it from the Dokan Github page by downloading
DokanSetup.exeunder Assets beneath the latest release. -
When done installing Dokan, restart HDL Batch Installer before continuing.
-
-
Under
Available partitionsselect the+OPLpartition.
-
Under
Mount pointselect a free drive.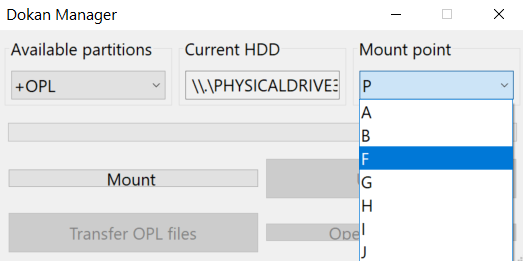
-
Click
Mountto mount the partition to the selected mount point.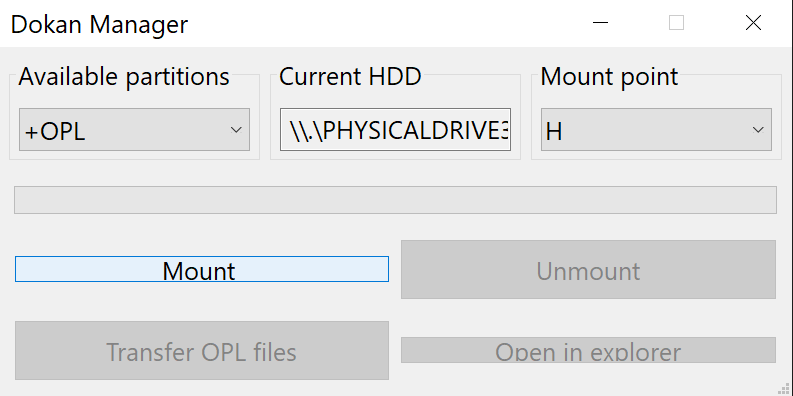
-
Select
Open in explorer.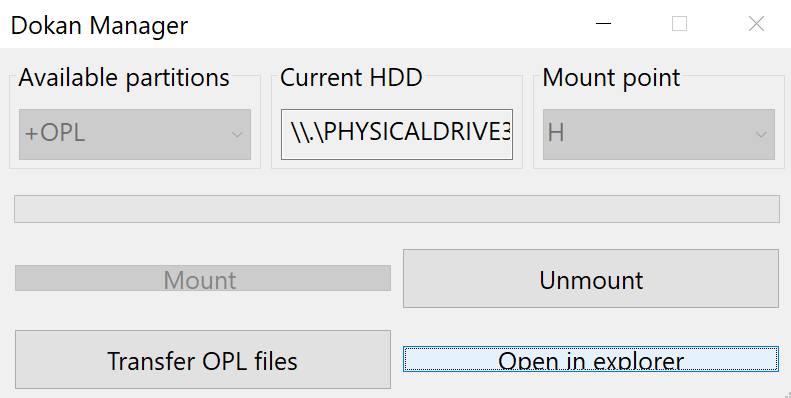
-
Copy artwork from the OPL Manager art folder located at
OPL_Manager/hdl_hdd/ARTto the +OPL partitionART/folder on the hard drive.- If you are copying themes, copy the folders (which use the naming prefix
thm_) to theTHM/directory.
- If you are copying themes, copy the folders (which use the naming prefix
-
When finished, click the
Unmountbutton to unmount the drive.
ALWAYS unmount the drive when finished!
This will prevent the drive from being corrupted.
Option 2: Transfer artwork to HDD using USB
If your PC is unable to mount the OPL partition, artwork can be loaded using a USB drive.
Requirements
- USB storage device formatted to FAT32
- FMCB card
Instructions
-
Copy the
ART/folder to the FAT32 USB drive.- In addition, themes can be installed by creating a folder called
THM/containing the themes (folders that start with thethm_prefix) and copying this to the drive as well. Follow the same steps but with theTHM/directory instead ofART/.
- In addition, themes can be installed by creating a folder called
-
Plug both USB and hard drive into PS2. Ensure that your FMCB card is inserted and boot up the PS2.
-
Select
uLaunchELF.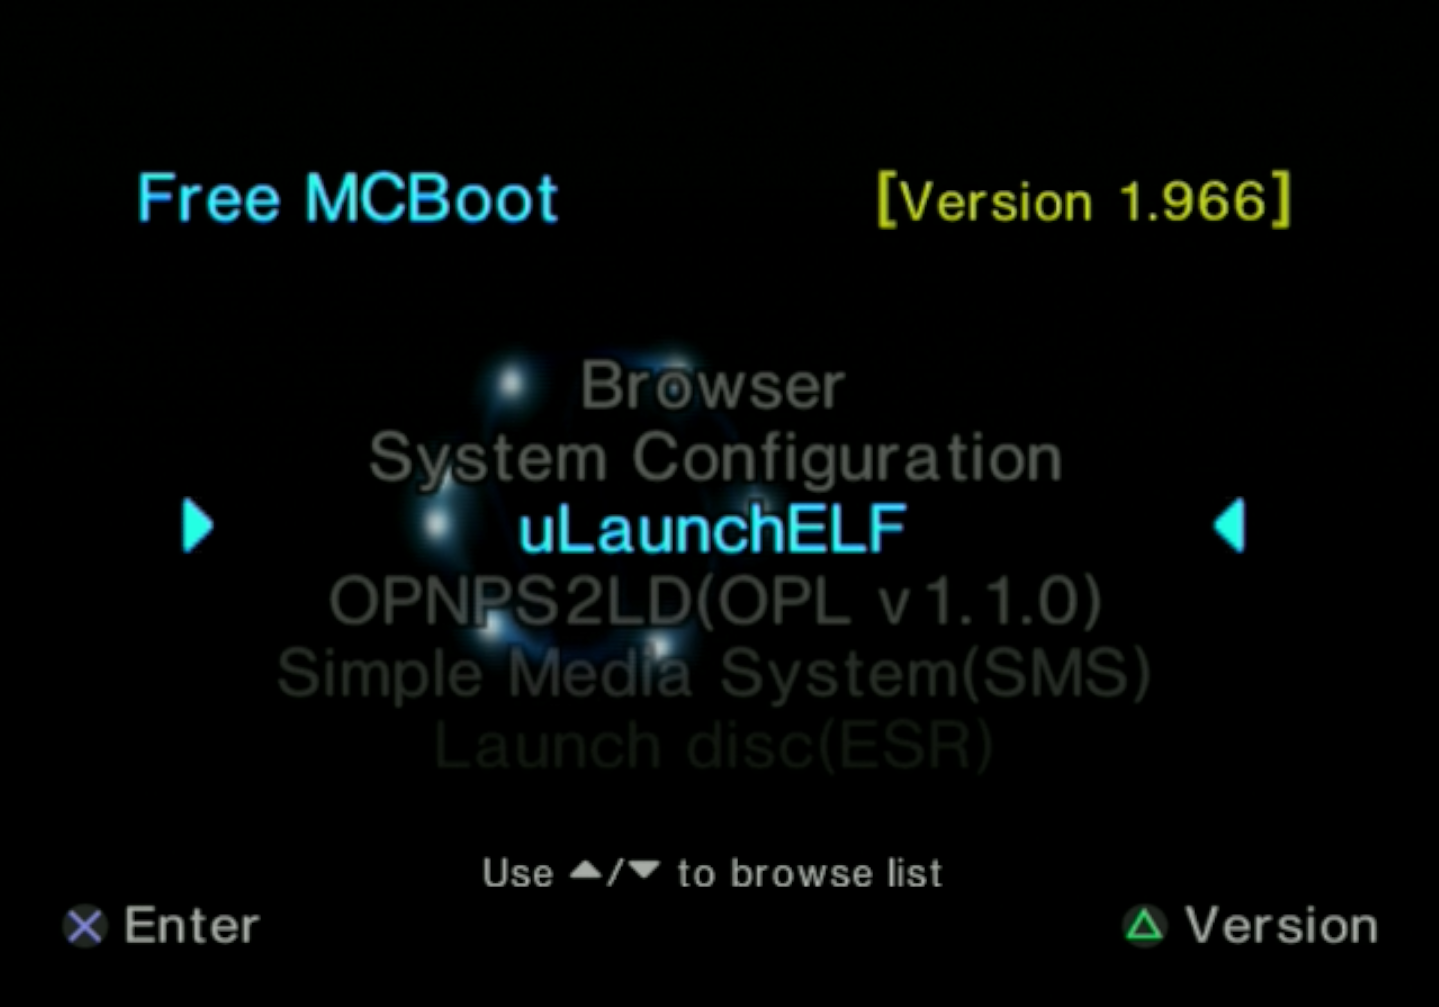
-
Press circle to access
FileBrowser.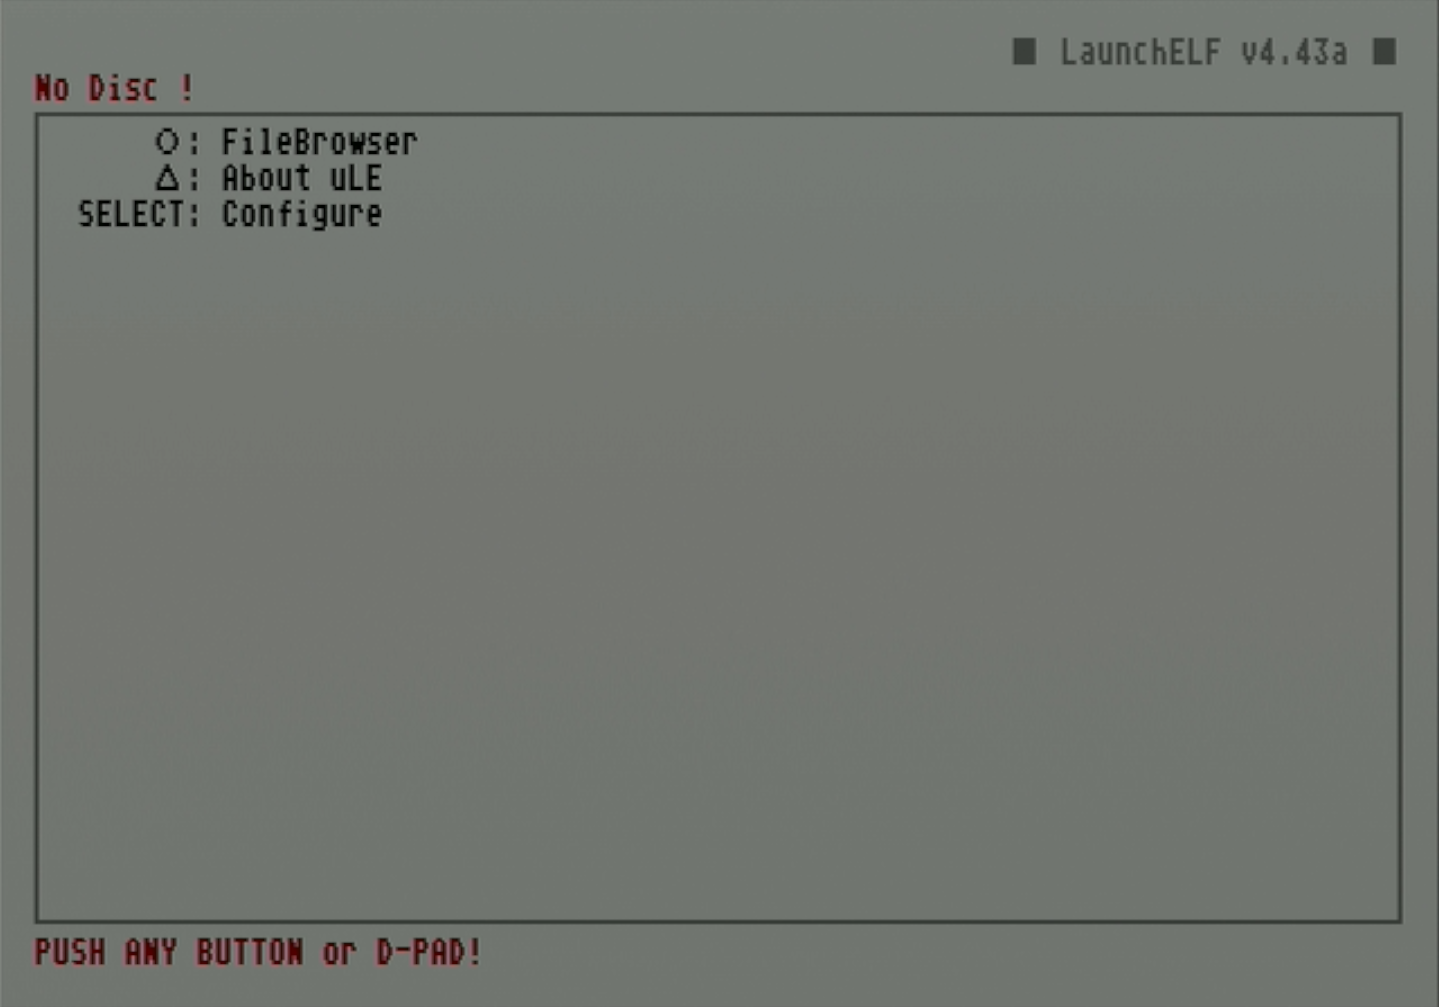
-
Scroll down and use circle to select
mass:/, which is the USB storage device storage.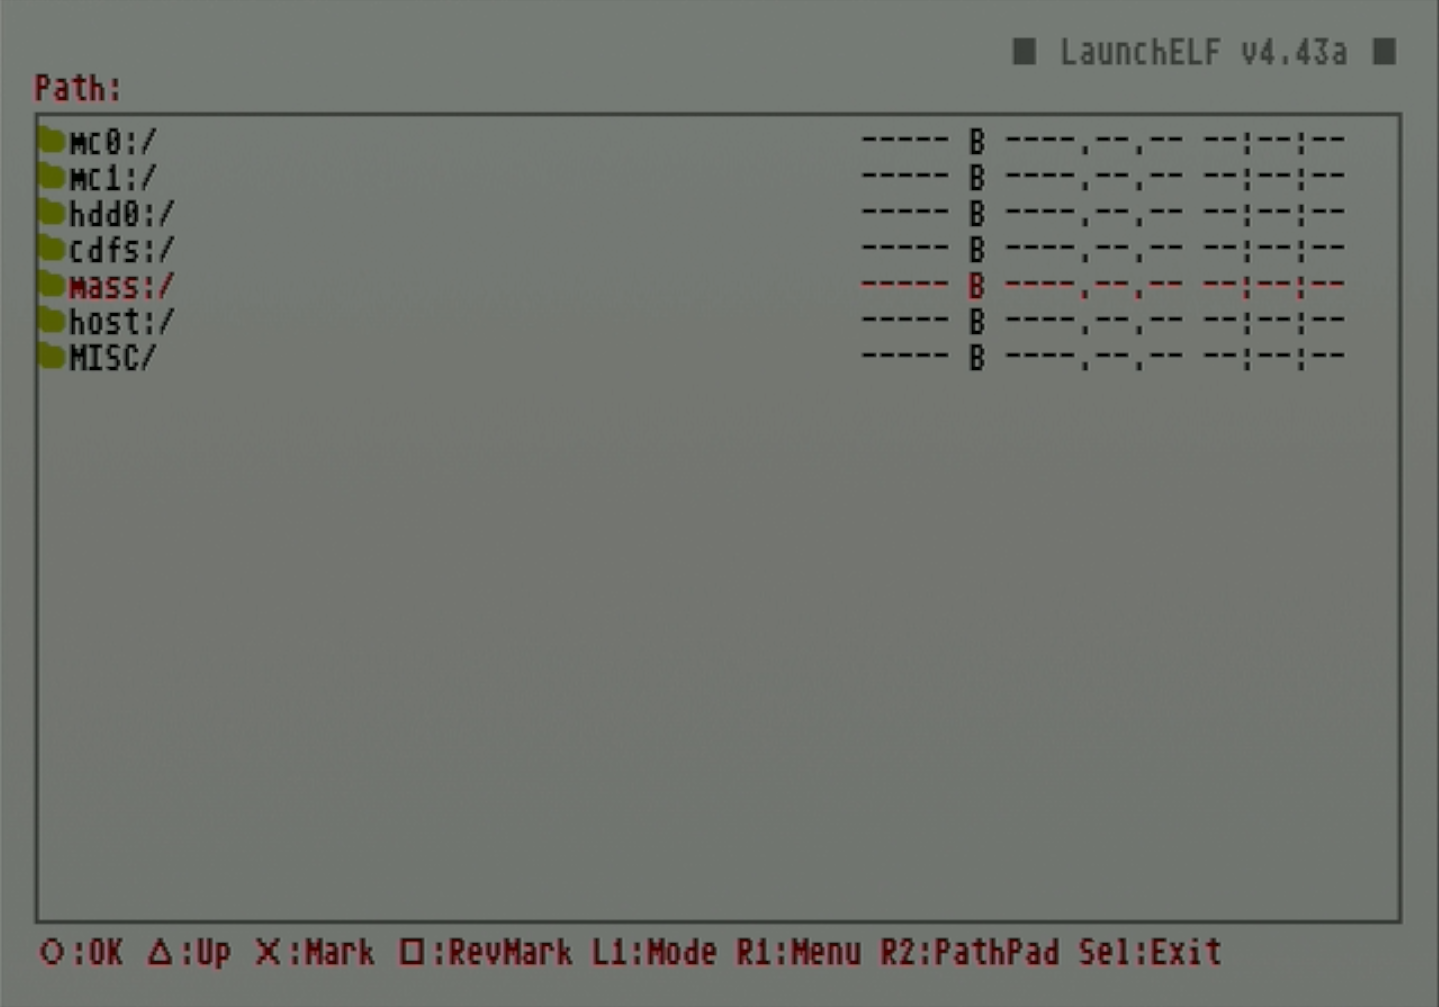
-
Find the
ART/directory and highlight it. Click R1 to open theMenu.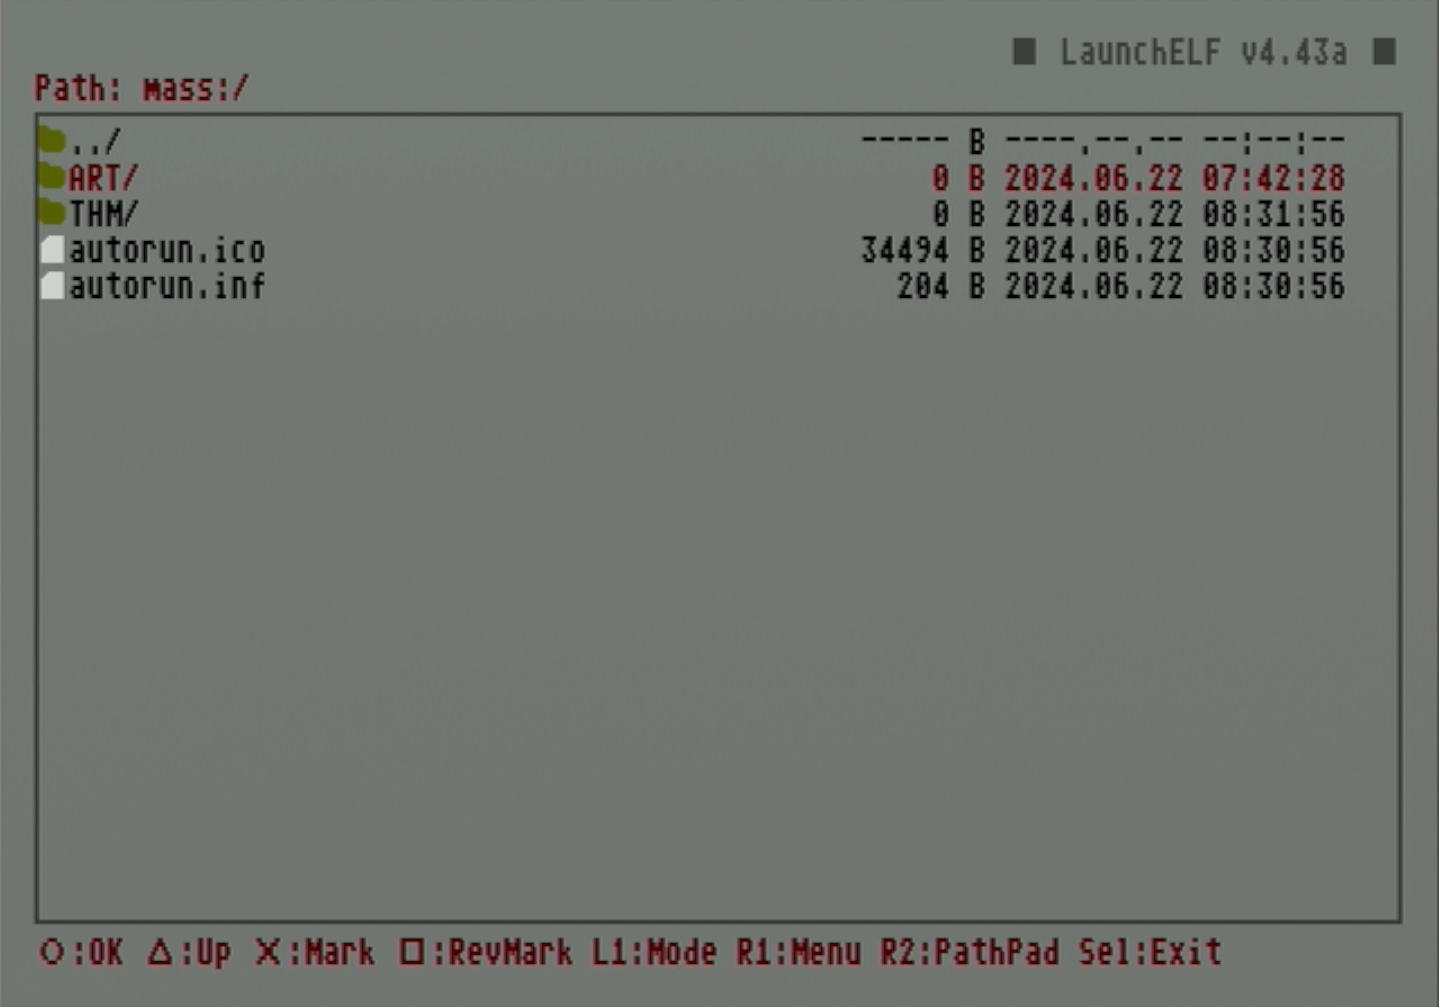
-
Press circle to select
Copy. The upper left status text will change to sayCopied to the Clipboard.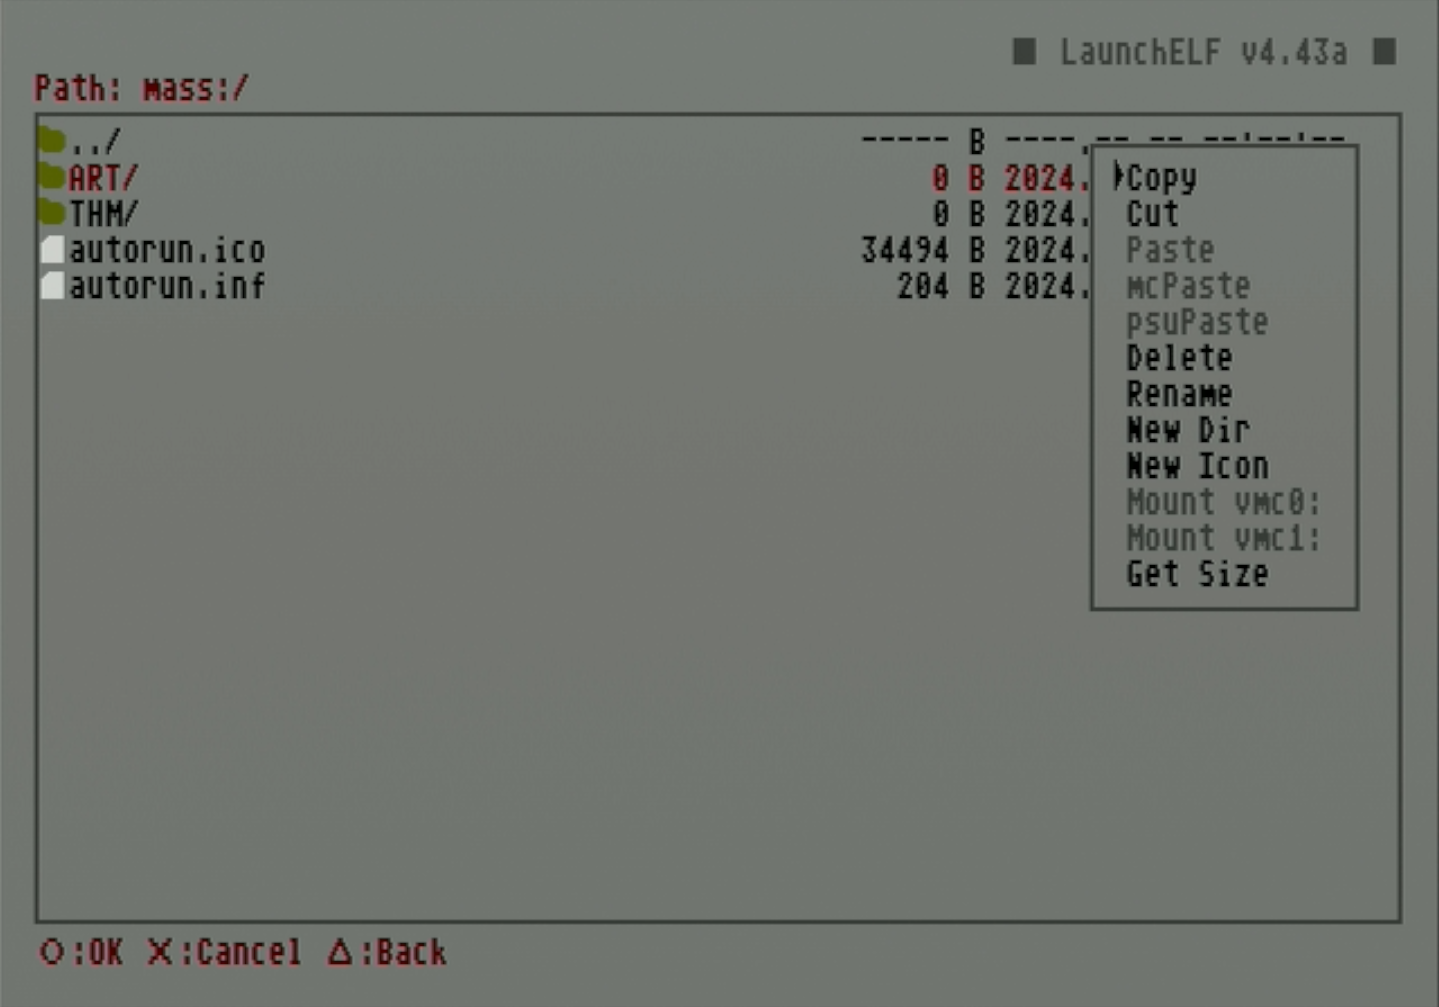
-
Press triangle to return to the previous folder. Scroll up to
hdd0:/and press circle.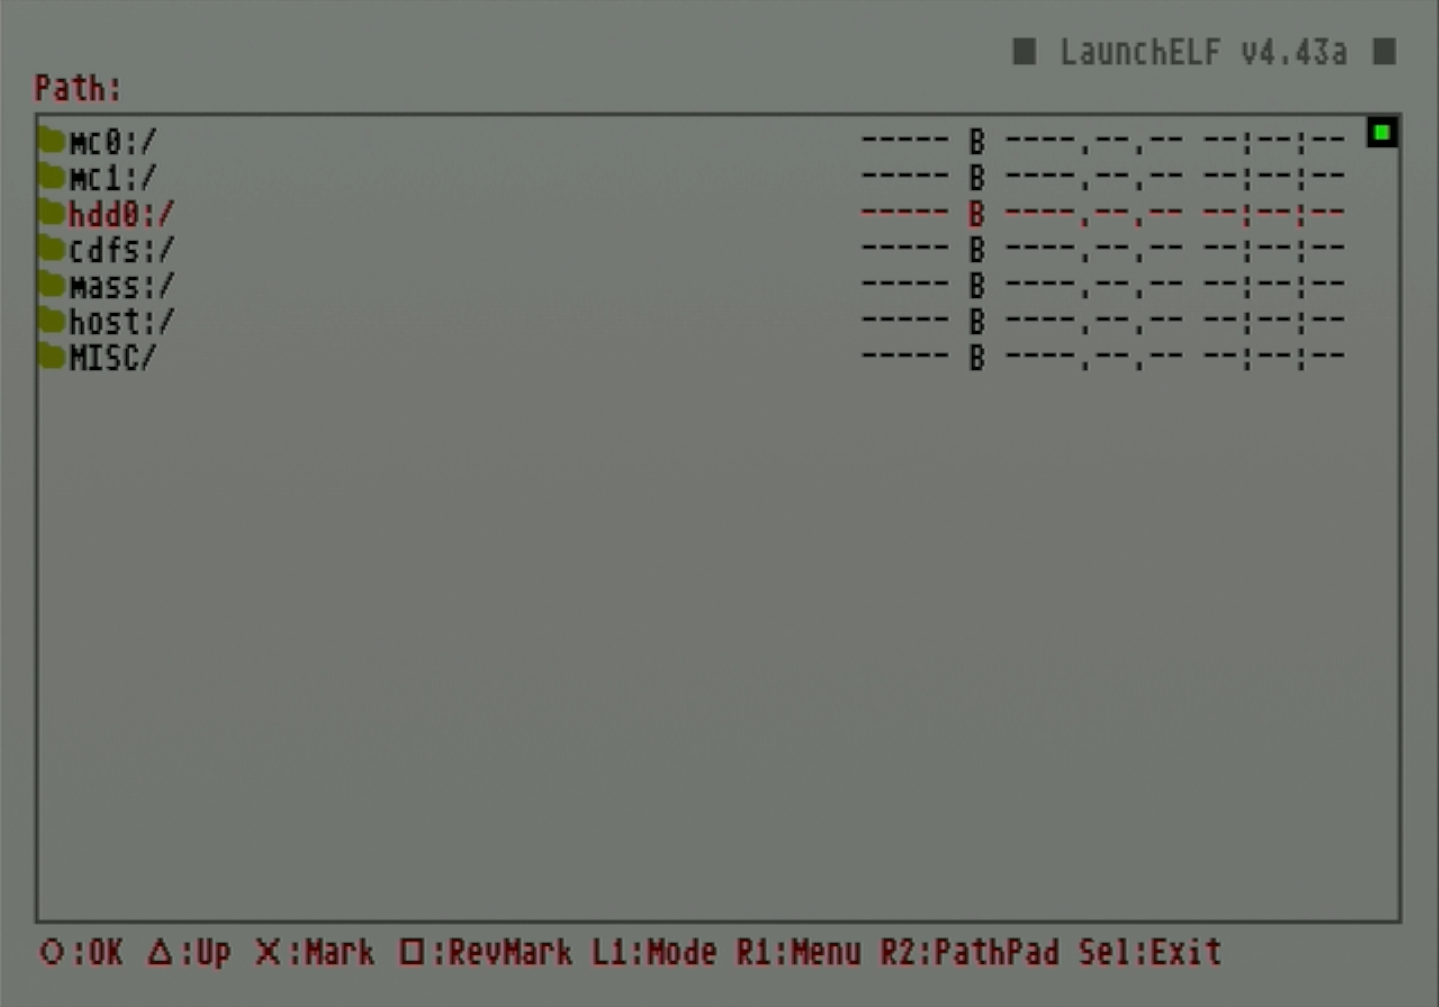
-
Scroll down to
+OPLand press circle.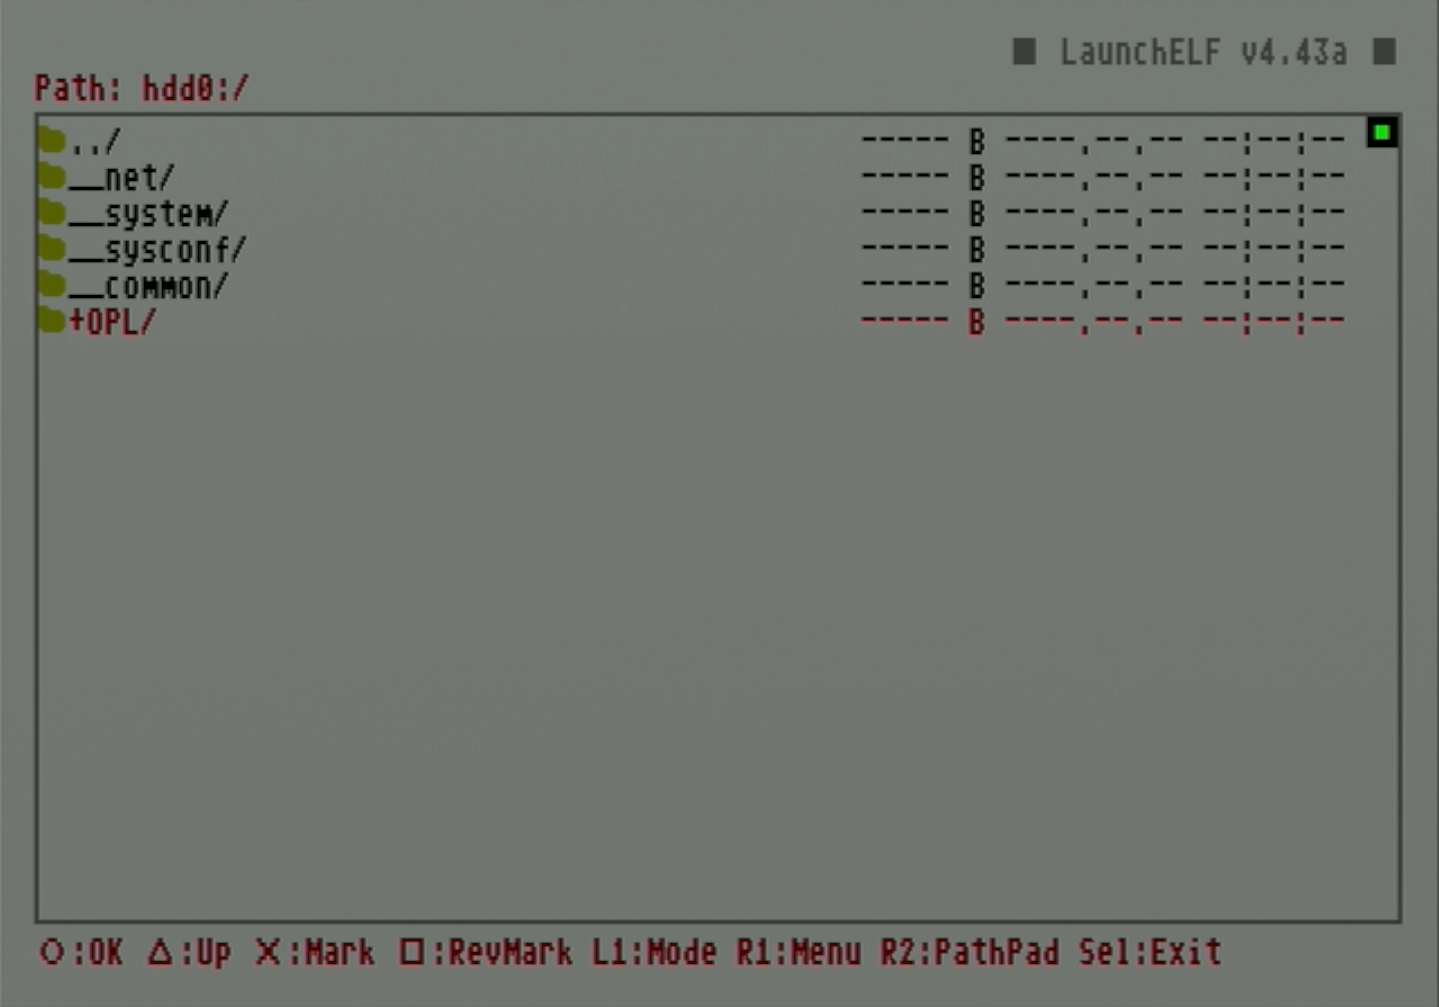
-
Press R1 to open the
Menuagain then press circle to select paste.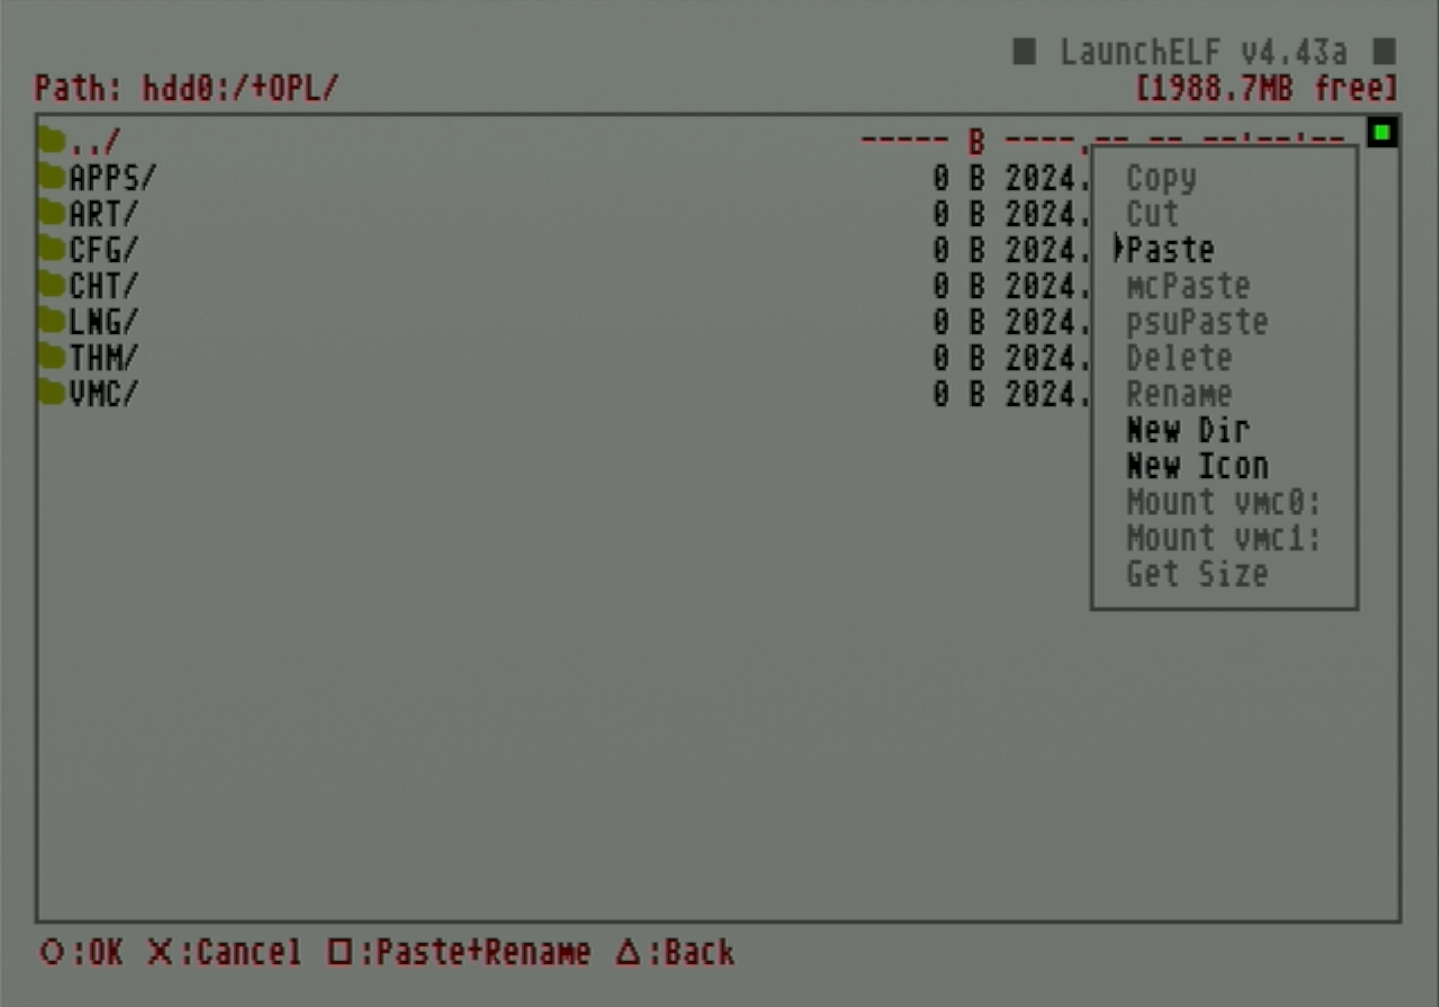
-
A name conflict warning dialog will appear. Press circle to select
OK.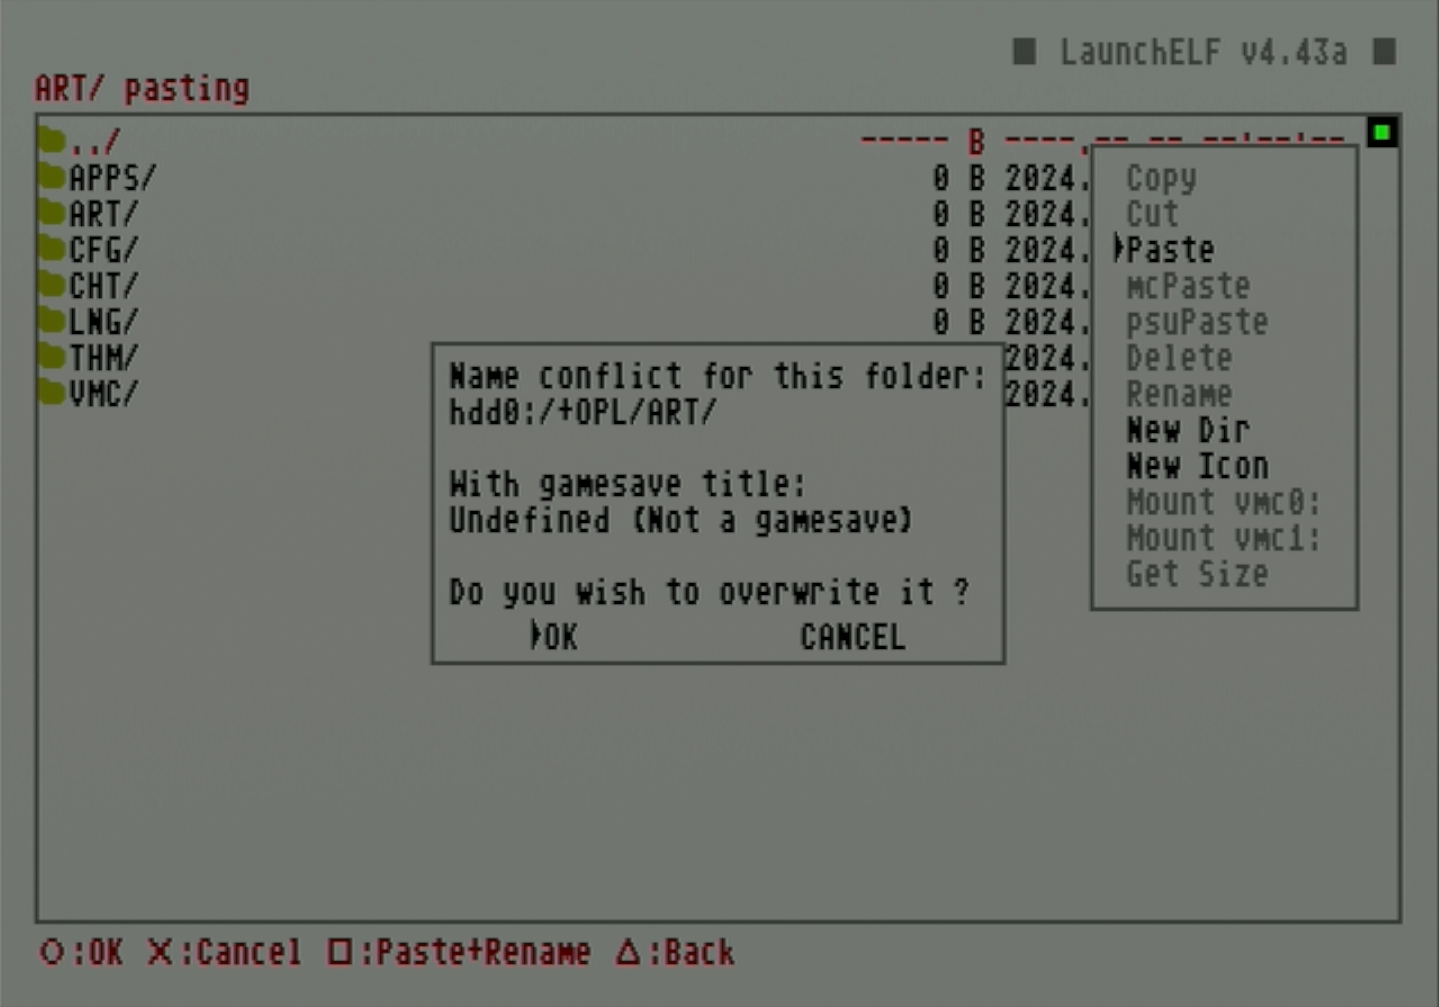
-
Once finished, open OPL to confirm the images or themes have been loaded correctly.
You are ready to play game backups complete with game artwork or themes for OPL.
Next: Setting up and using OPL
This is the end of the main tutorials of the internal HDD guide. However, if you would like to load Free McBoot without a memory card, it is possible to load it directly from the hard drive by installing Free HDBoot instead. This method has a slightly slower boot time but may be preferable if you always want to run the exploit (without the ability to revert to stock) or both memory card slots are needed.