Format and create partitions on hard drive
This guide will cover how to format and partition a hard drive for usage as an internal drive in a PS2. Both of these steps can be done directly on the PS2 using uLaunchELF/wLaunchELF loaded from a Free McBoot card.
Formatting with WinHIIP
Another alternative to formatting the drive with uLaunchELF is to use WinHIIP. WinHIIP is no longer recommended because it is obsolete, struggles to format drives as large as 2TB, and has bugs that may corrupt drives.
Credits
- This guide follows Blaine Locklair's YouTube tutorial
Requirements
- Internal hard drive
- Official PS2 network adapter
- With SATA connector upgrade if using SATA hard drive
- FMCB memory card
Instructions
Format hard drive
-
Attach the hard drive to the SATA or IDE connection on the network adapter.
SATA drives
If you are using a SATA drive, ensure that you have installed an upgrade kit on the network adapter so that it has a SATA connector instead of IDE. This text guide on the console mods wiki walks through the process.
-
Remove the panel labeled
EXPANSION BAYfrom the back of the PS2. Slot the network adapter with the attached hard drive into this slot with the connectors. Turn the two large screws on the adapter to attach it firmly. -
Plug the FMCB card into the memory card slot and boot up the PS2.
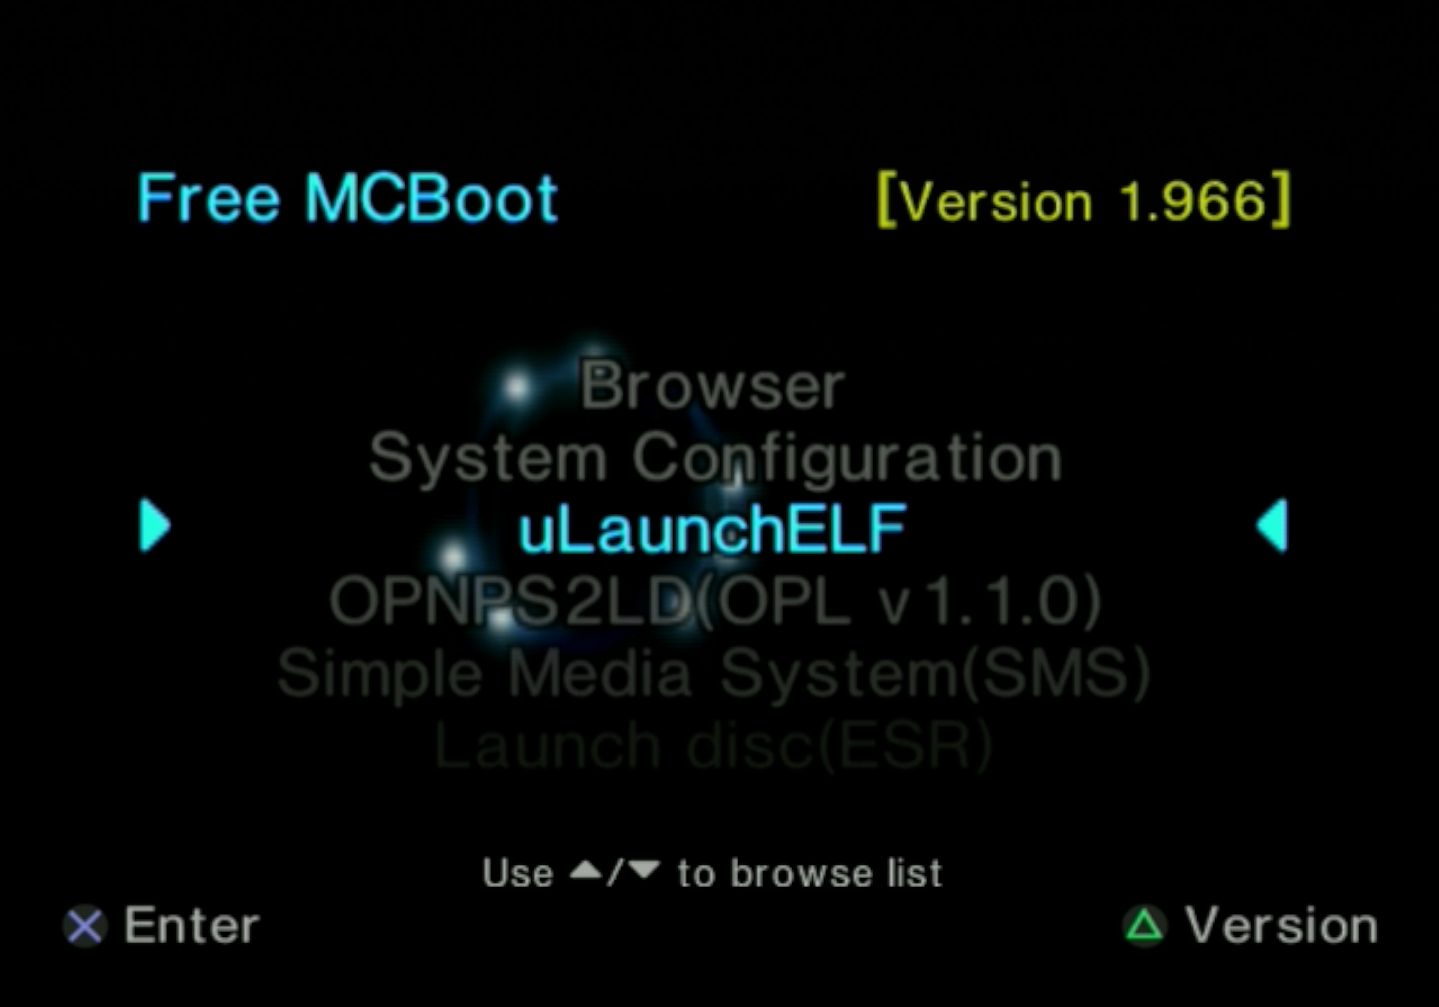
uLaunchELF/wLaunchELF
If you have not launched the PS2 with the FMCB card inserted before you will notice some apps have been added to the home menu. One of these will be named
uLaunchELFor its newer version,wLaunchELF. This app can browse files and launch executables on the PS2, specifically.elffiles. -
Launch
uLaunchELF/wLaunchELFfrom the main menu.- If the option is not available, try booting with the FMCB memory card inserted into the other slot. Some cards may have issues being read from the second slot.
-
Within uLaunchELF/wLaunchELF, the circle is used to select. Press circle to advance to the
FileBrowser.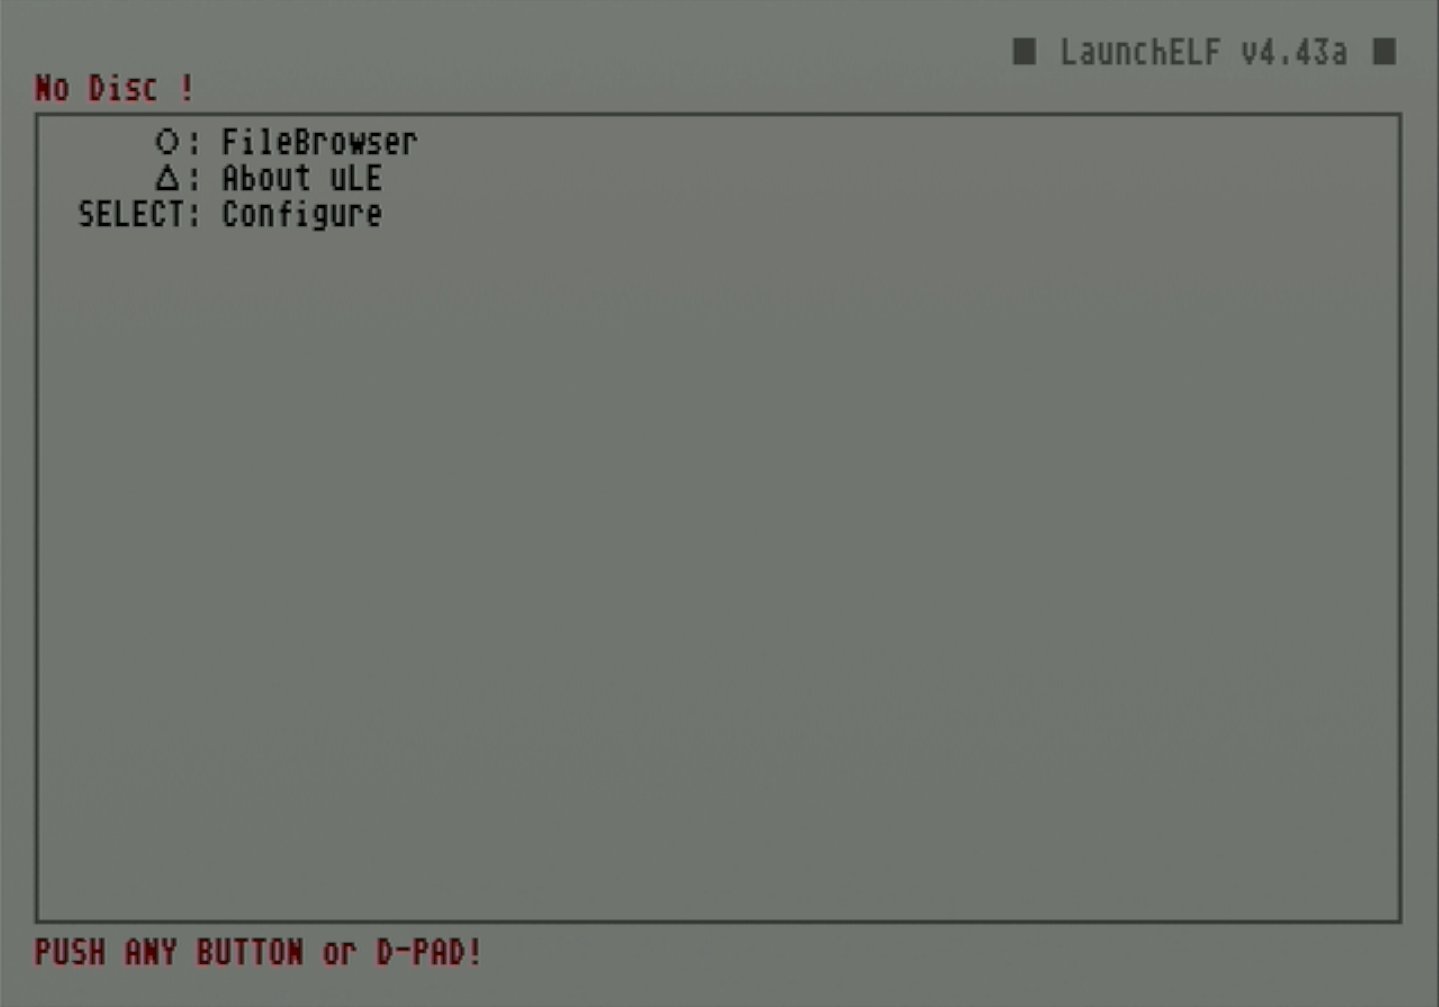
-
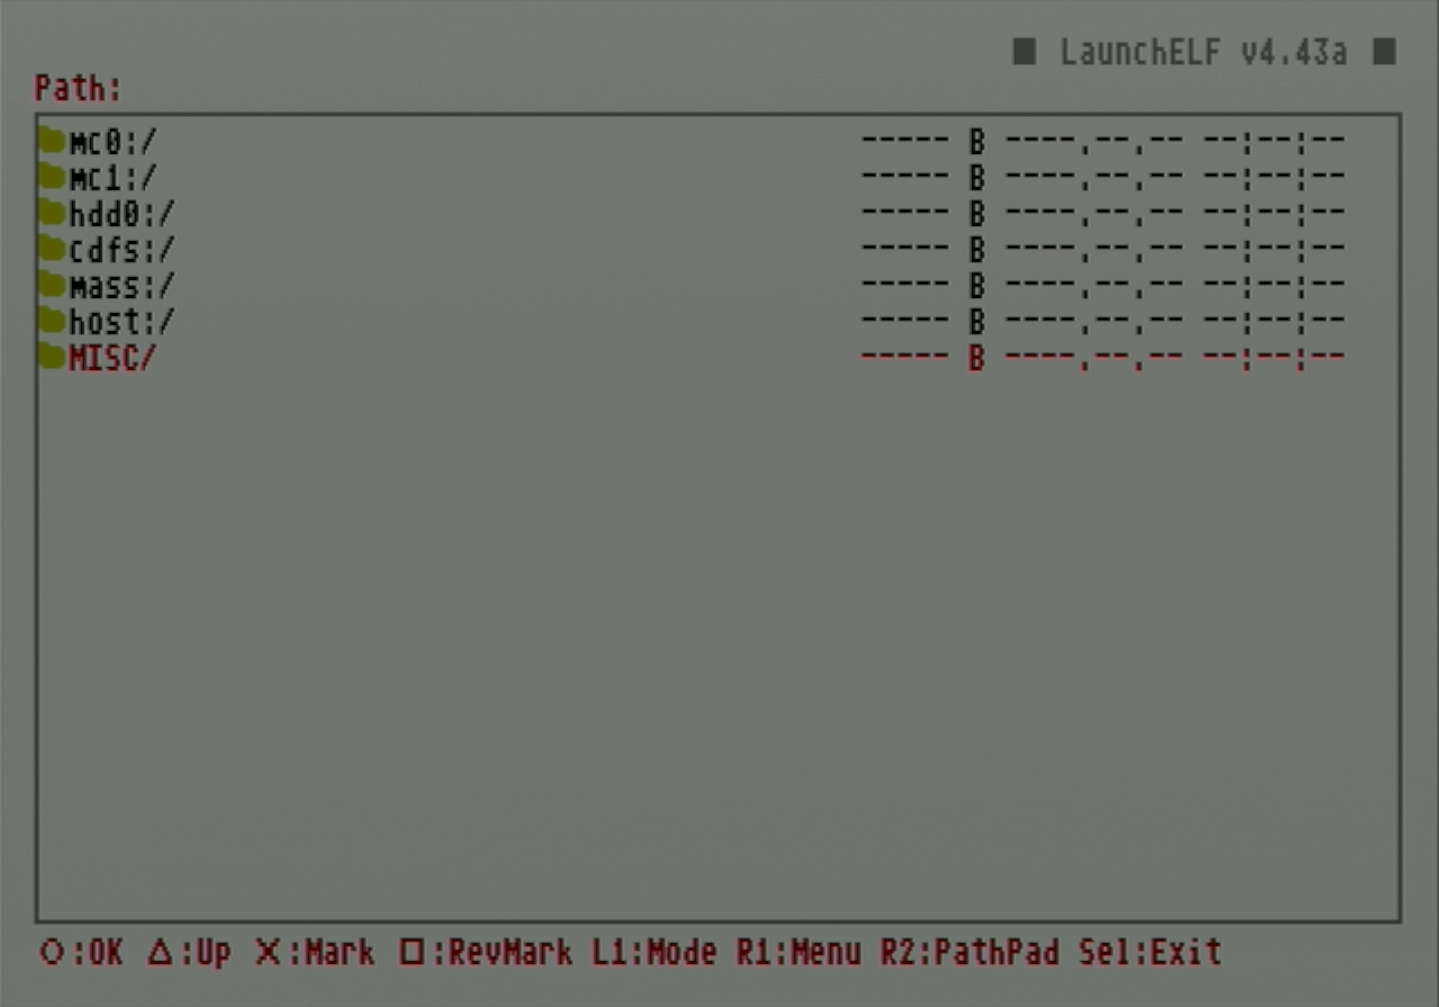
Use d-pad to navigate to
MISC/and press circle to select it.- If you mistakenly select the wrong folder, press the triangle button to return to the higher directory.
-
Navigate to
HddManagerand press circle to select it.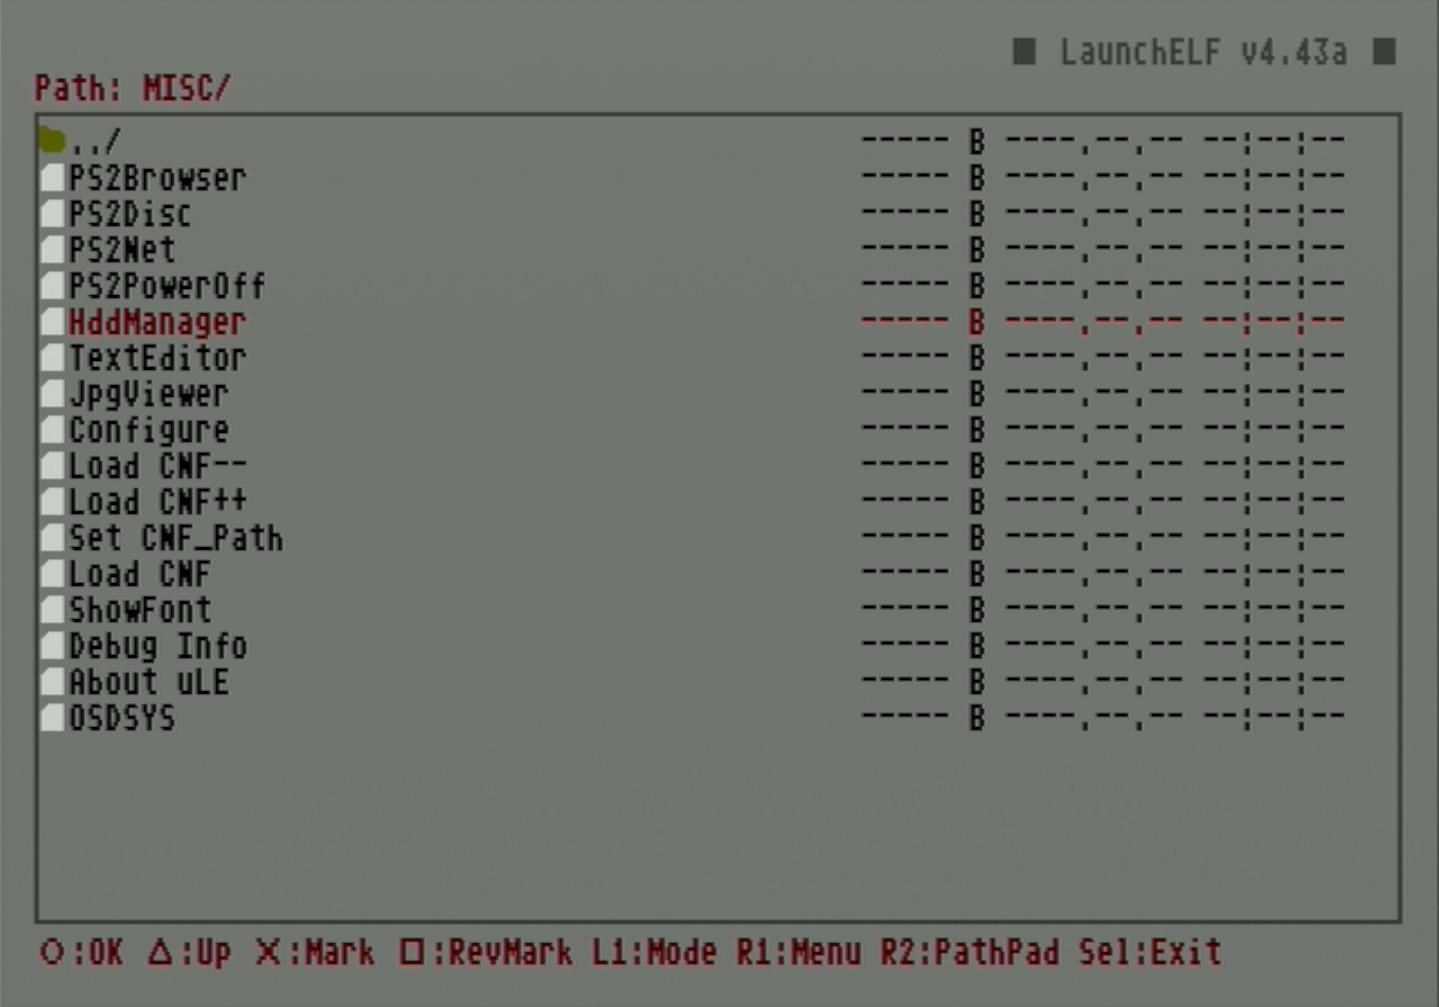
-
The PS2 HDD Manager screen should show the HDD as connected but not formatted. Press R1 to access the menu.
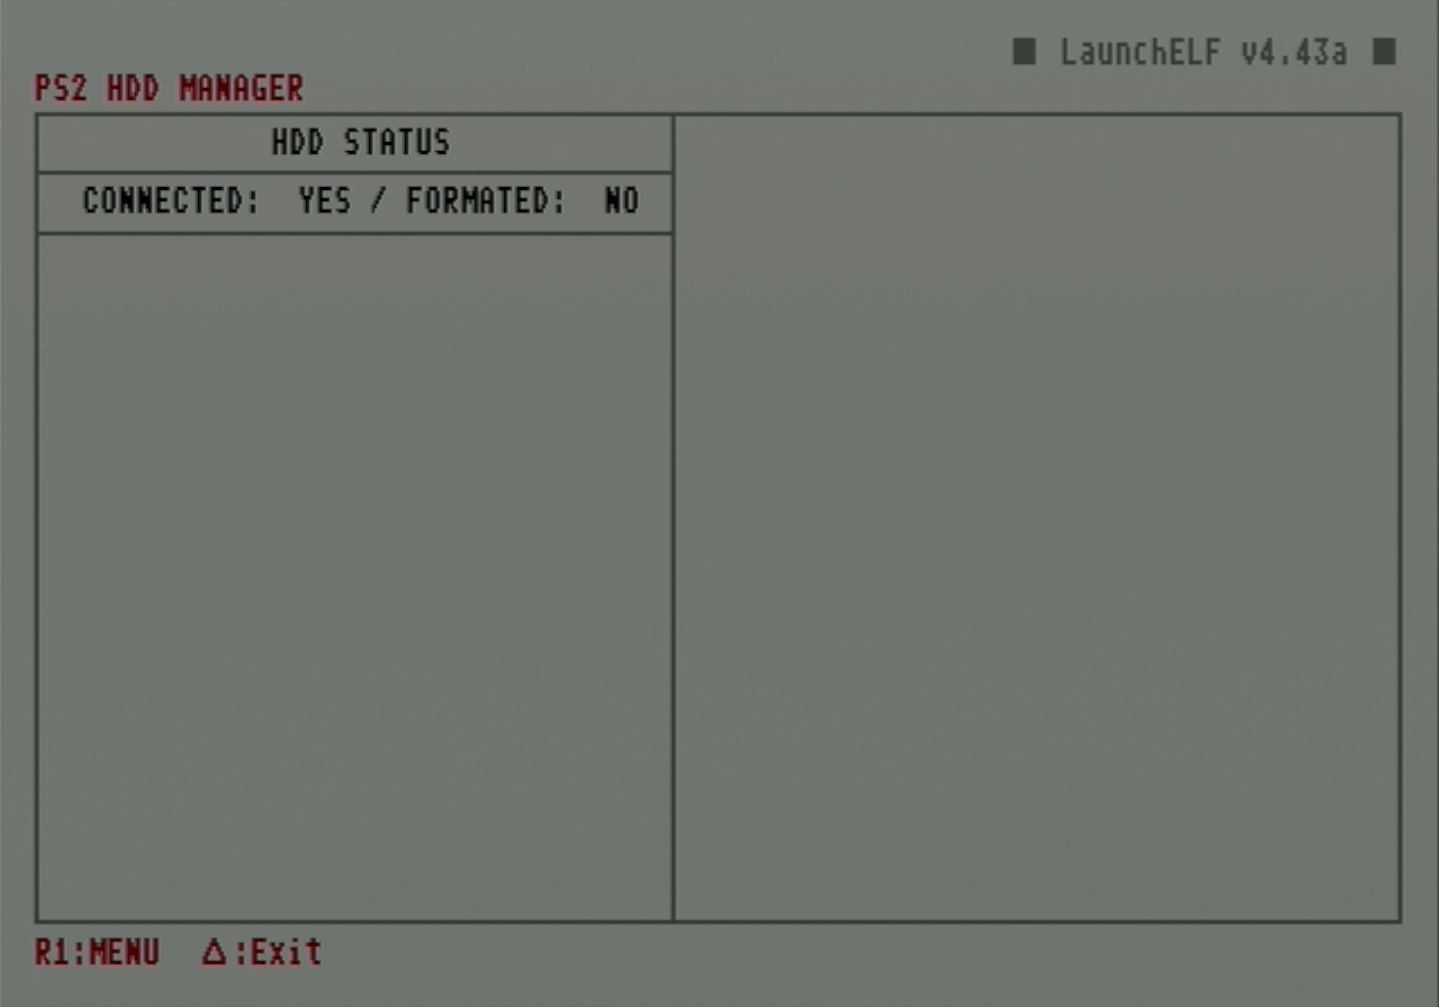
-
When the small menu pops up on the right, scroll down and select
Format.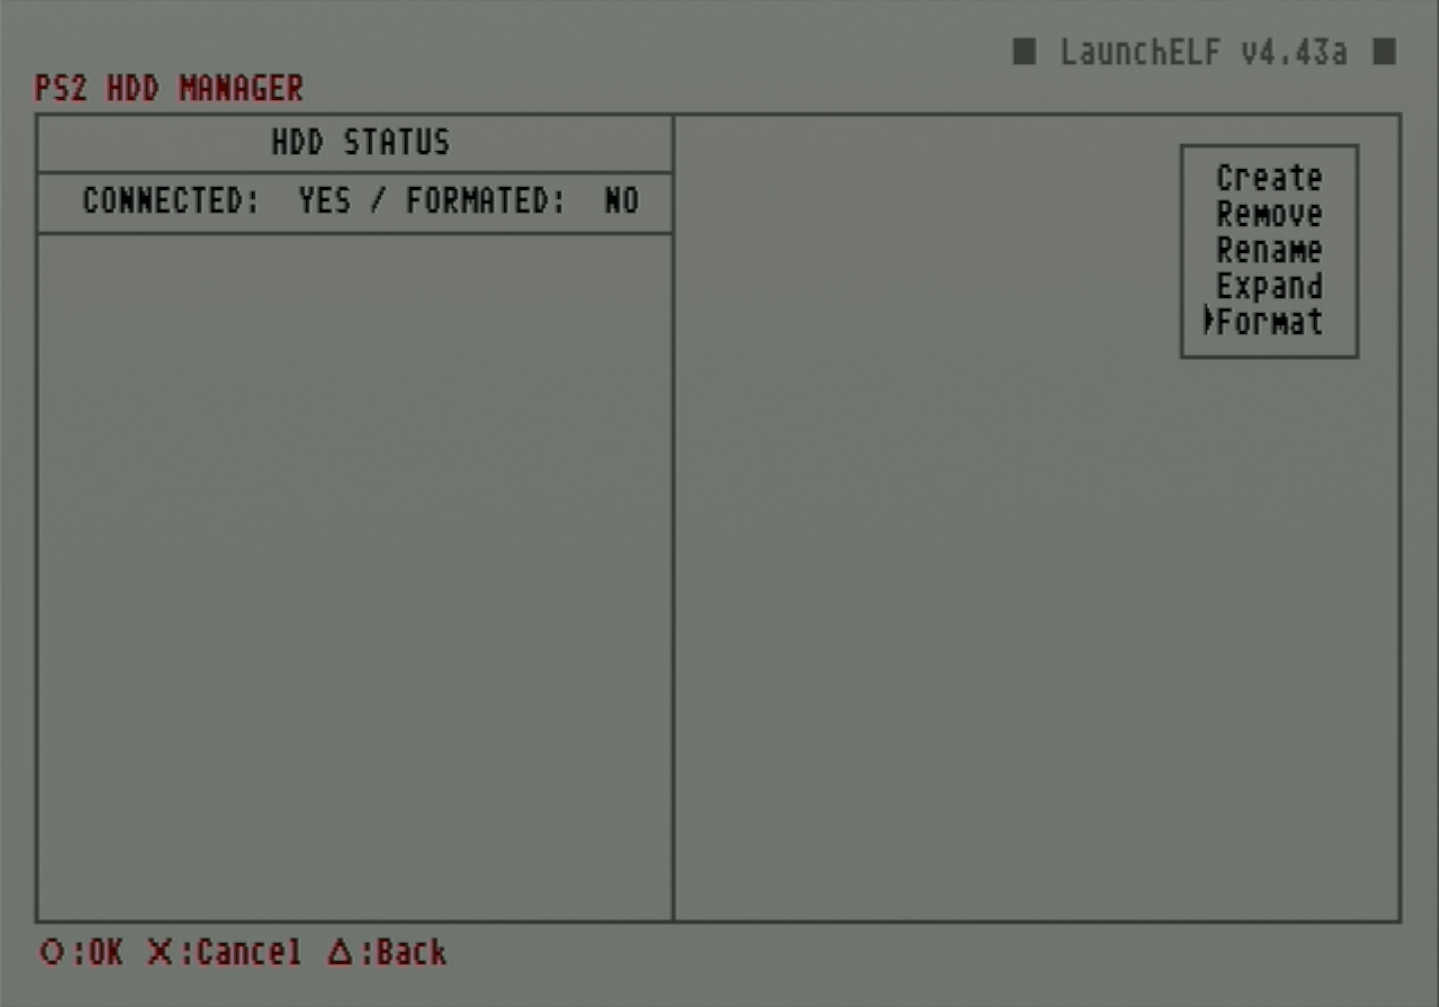
-
Press circle to select
OKon the popup. Once the format is completed, the partition status of the drive will be displayed.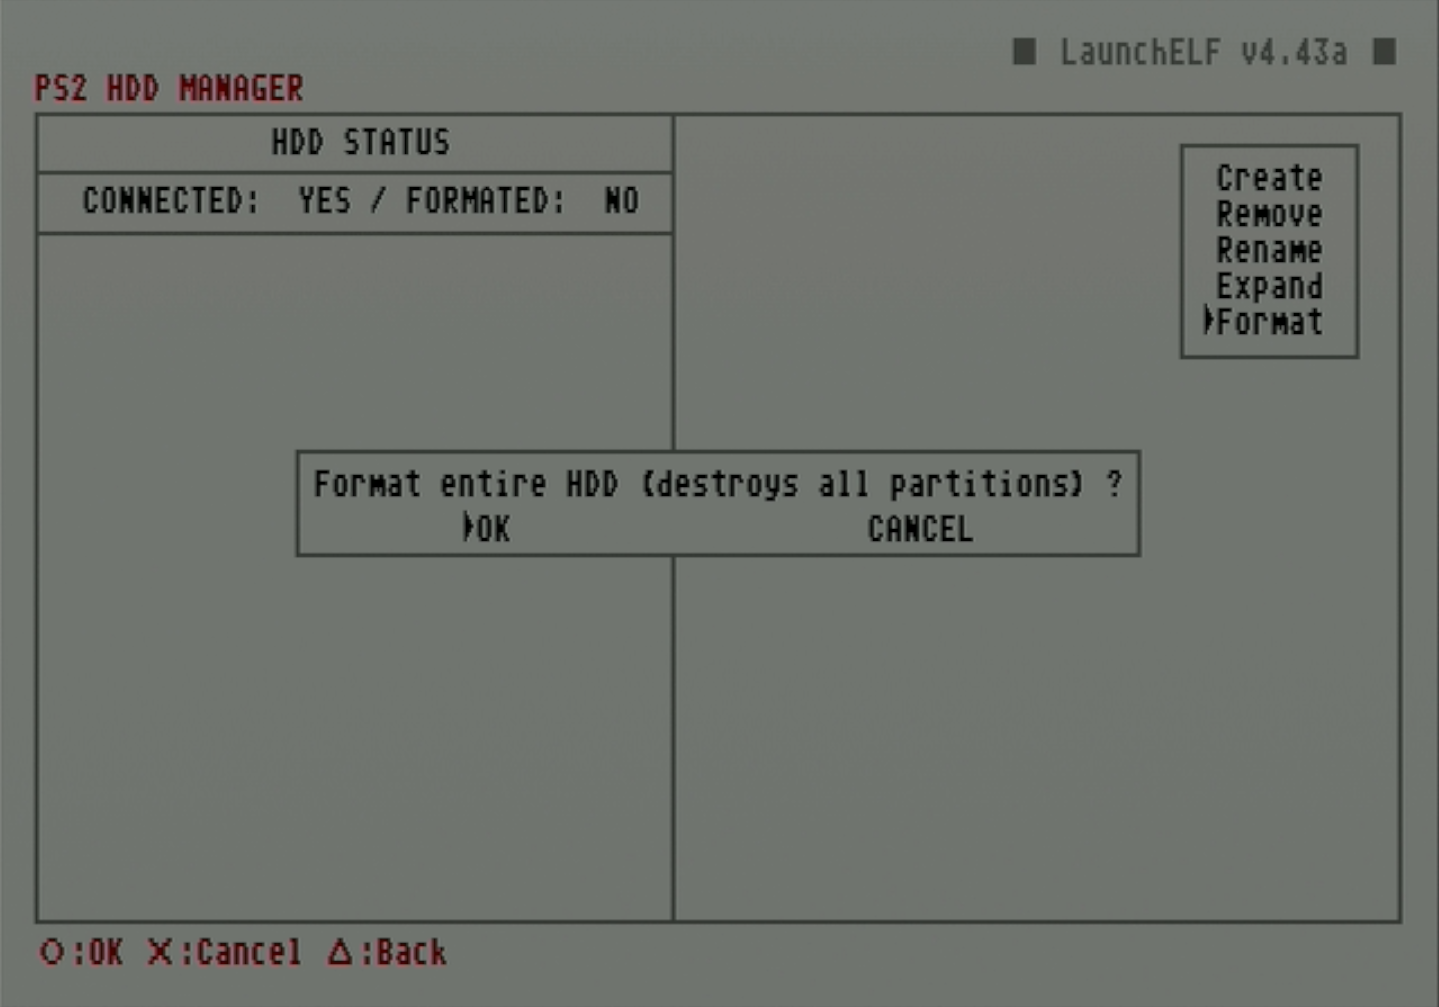
Create OPL data partition
-
In these next steps, we will create a partition specifically for OPL data such as artwork and themes. Press R1 to access the
MENU.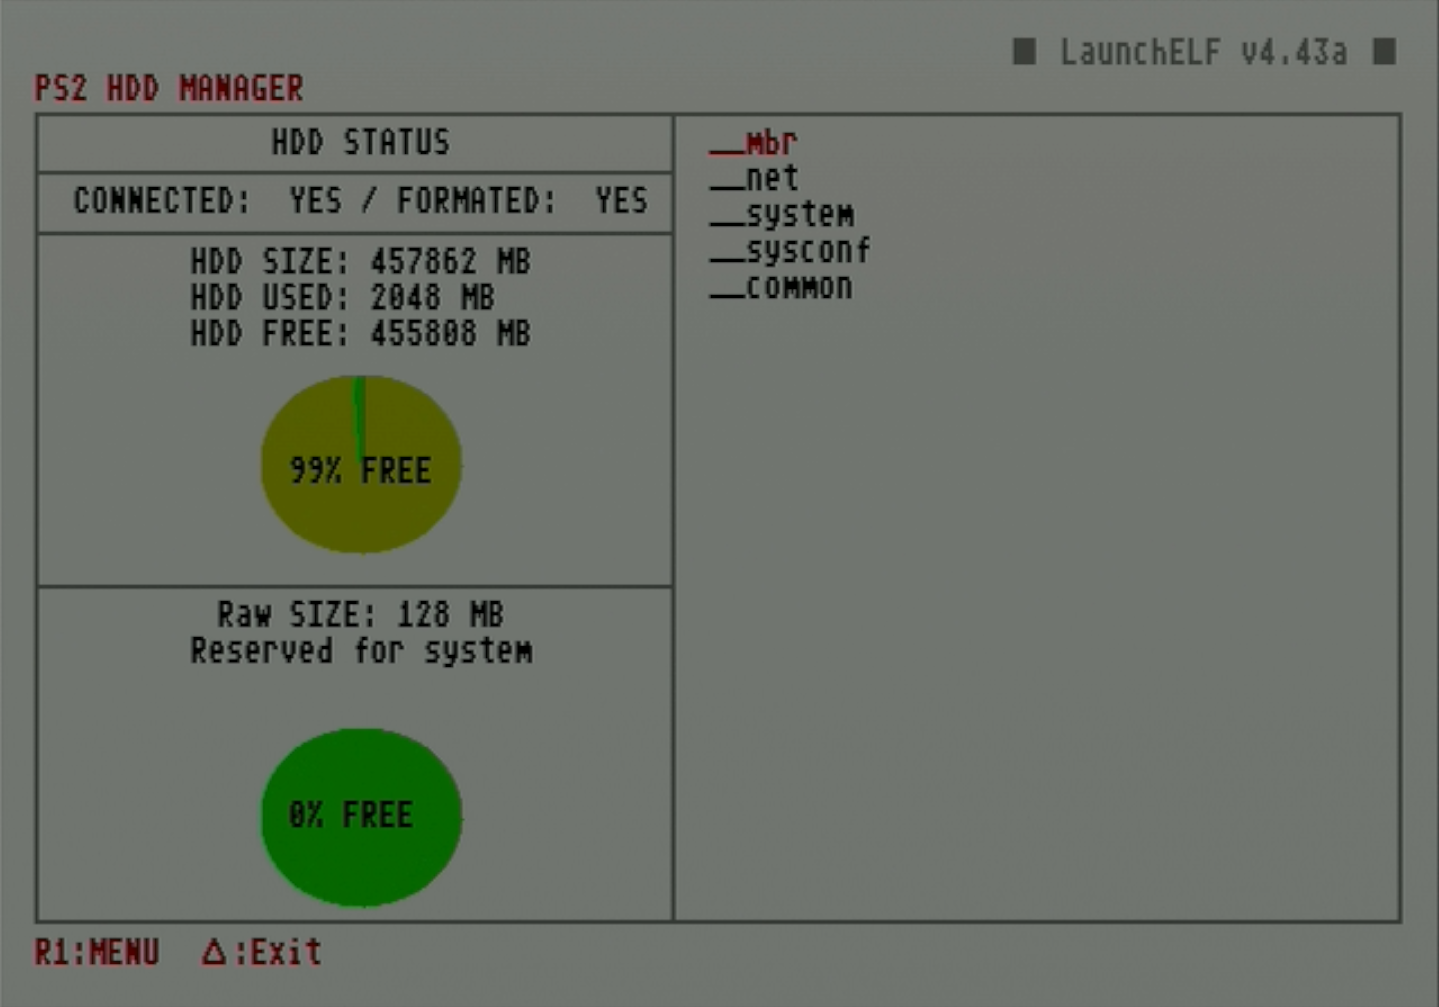
-
Press circle to select the
Createoption.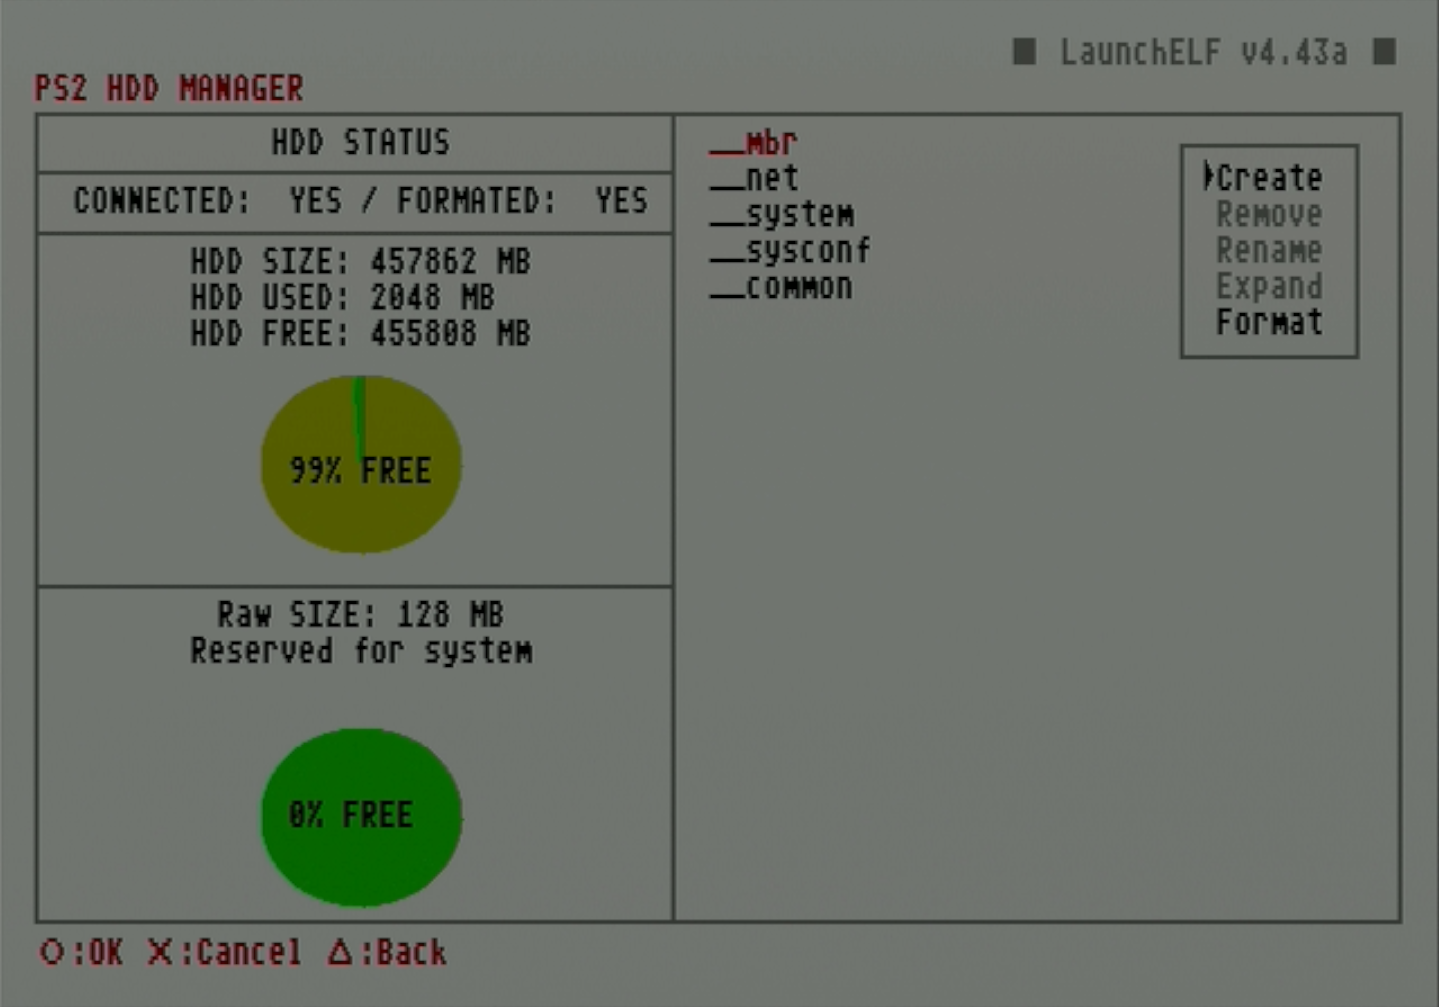
-
Set the name of this partition to
+OPLthen selectOK.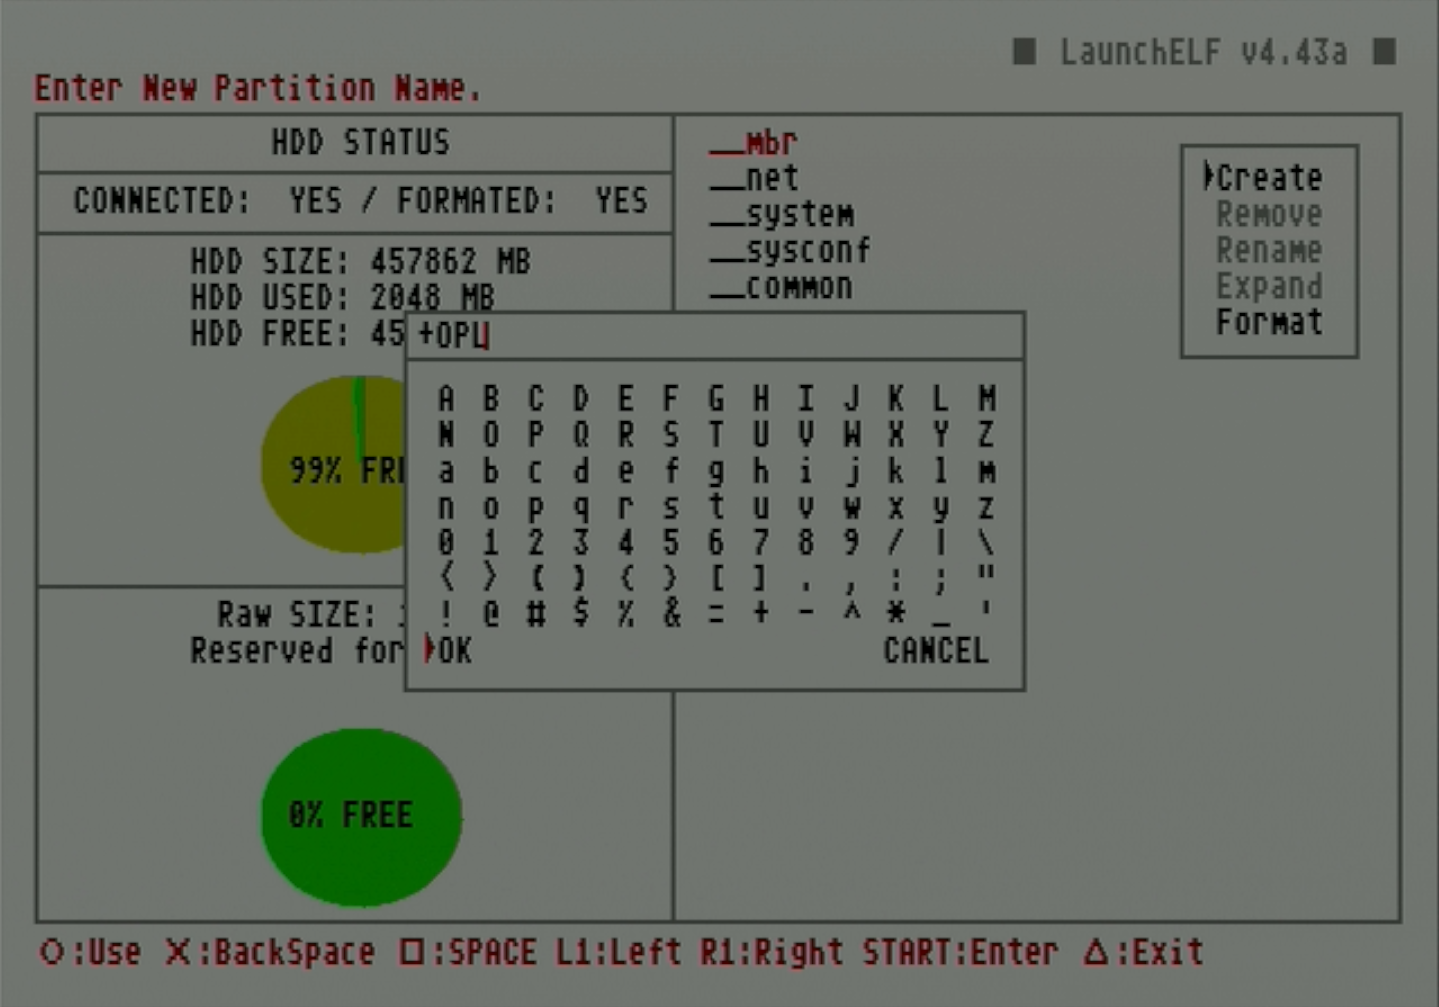
-
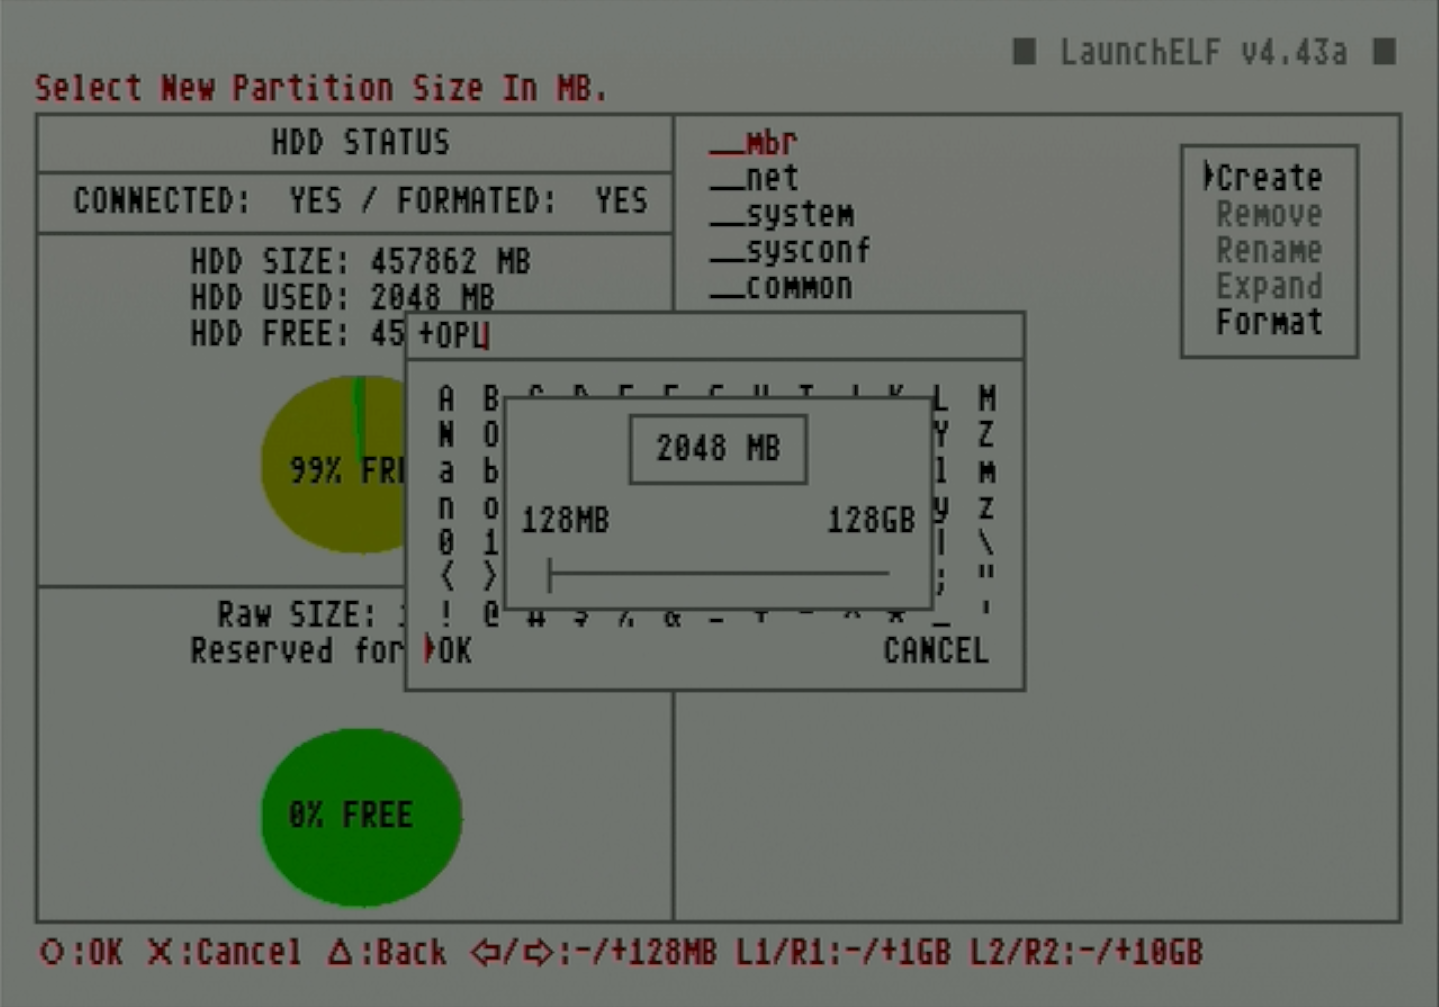
Set the partition size for the OPL app data.
- The recommended partition size depends on the amount of data needed to store OPL-related data such as game artwork, VMCs, and themes. Estimates for standard values range from 512MB to 2048MB, or even 4096MB+ for users planning to load a lot of artwork.
Expanding the +OPL partition size
While the HddManager has the option to expand existing partitions, this has the potential to corrupt the partition. In case the +OPL partition needs to be expanded later, a batch tool workaround exists.
-
Press circle to select
OK.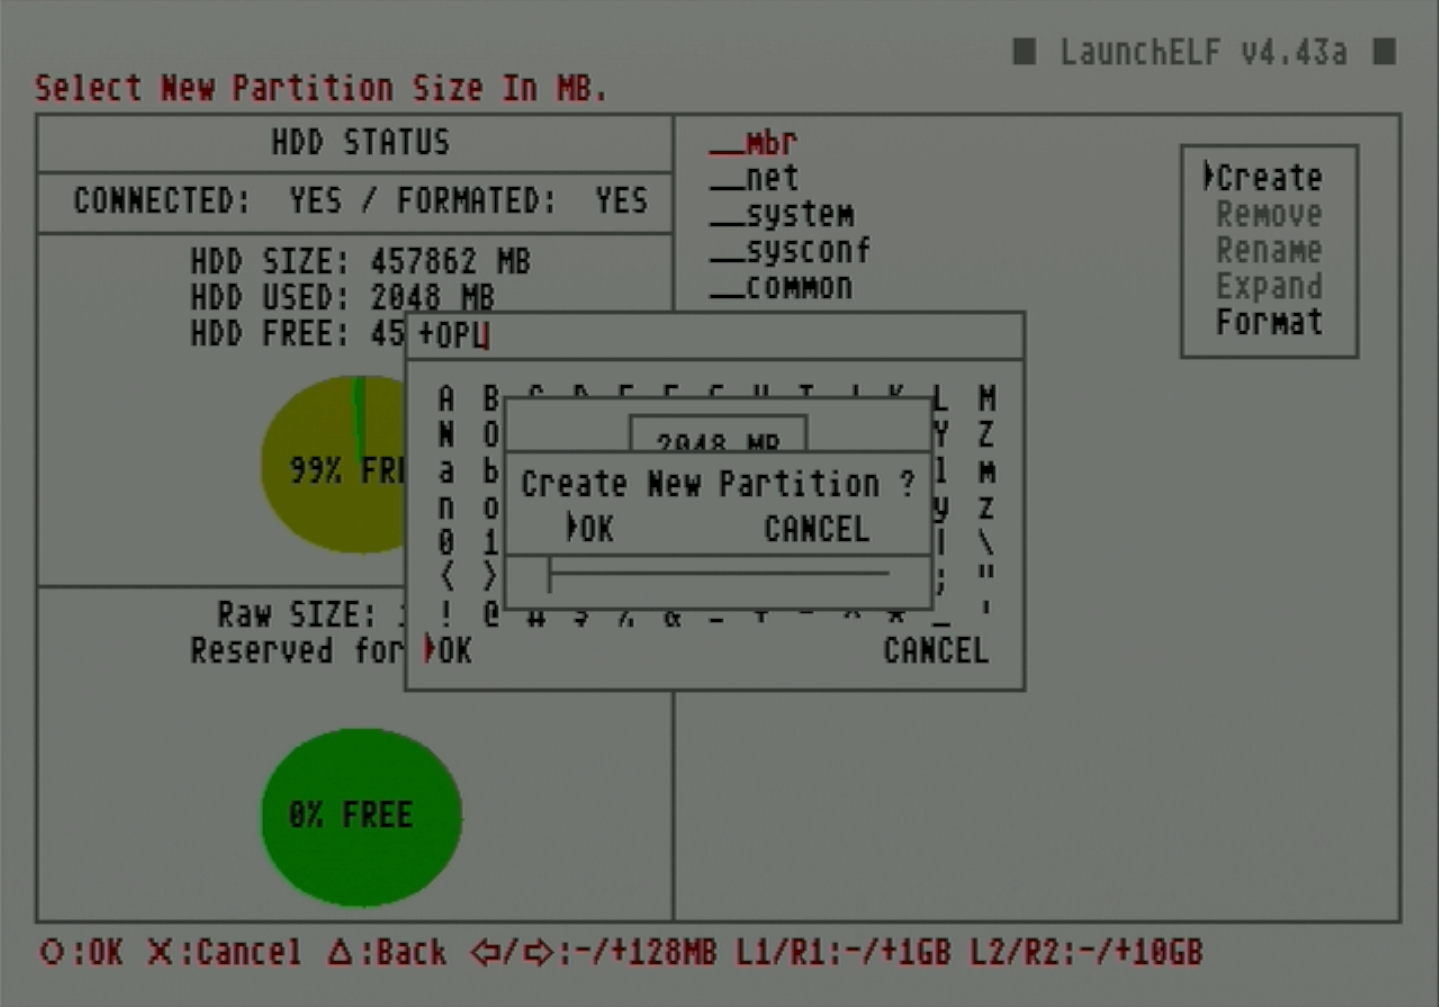
-
Once finished, it will show the created partition. Press triangle to
Exit.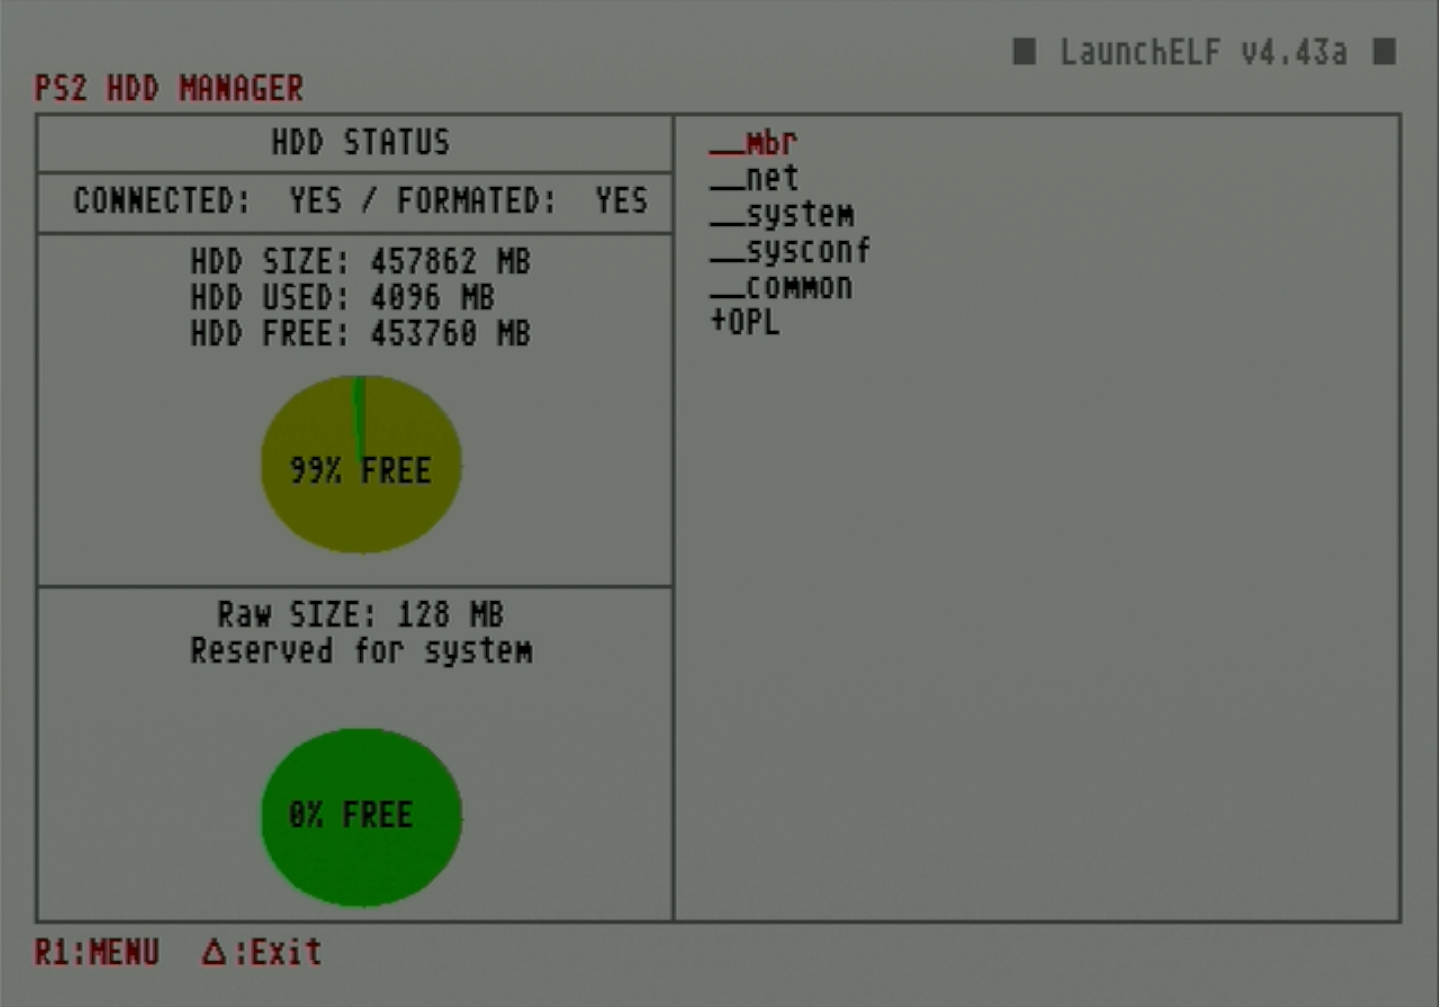
Removing an internal hard drive
Always ensure the PS2 is properly powered off before removing the internal hard drive.
Once the hard drive has been formatted, game backups can be installed onto it and played through OPL.
Before moving to the next guide, ensure that OPL is installed on your FMCB card. Many pre-made FMCB cards will have apps such as OPL already loaded. However, if OPL isn't installed (or is outdated), follow the below optional guide to install or update it first.
Next (ONLY if not installed): Install OPL onto FMCB card
If OPL is installed, continue below.
Tip: Generate default OPL folders
Before removing the hard drive from the PS2, launch OPL to generate the appropriate subdirectories. This can set up folders ahead of time if you plan to load game artwork or OPL themes directly from PC.